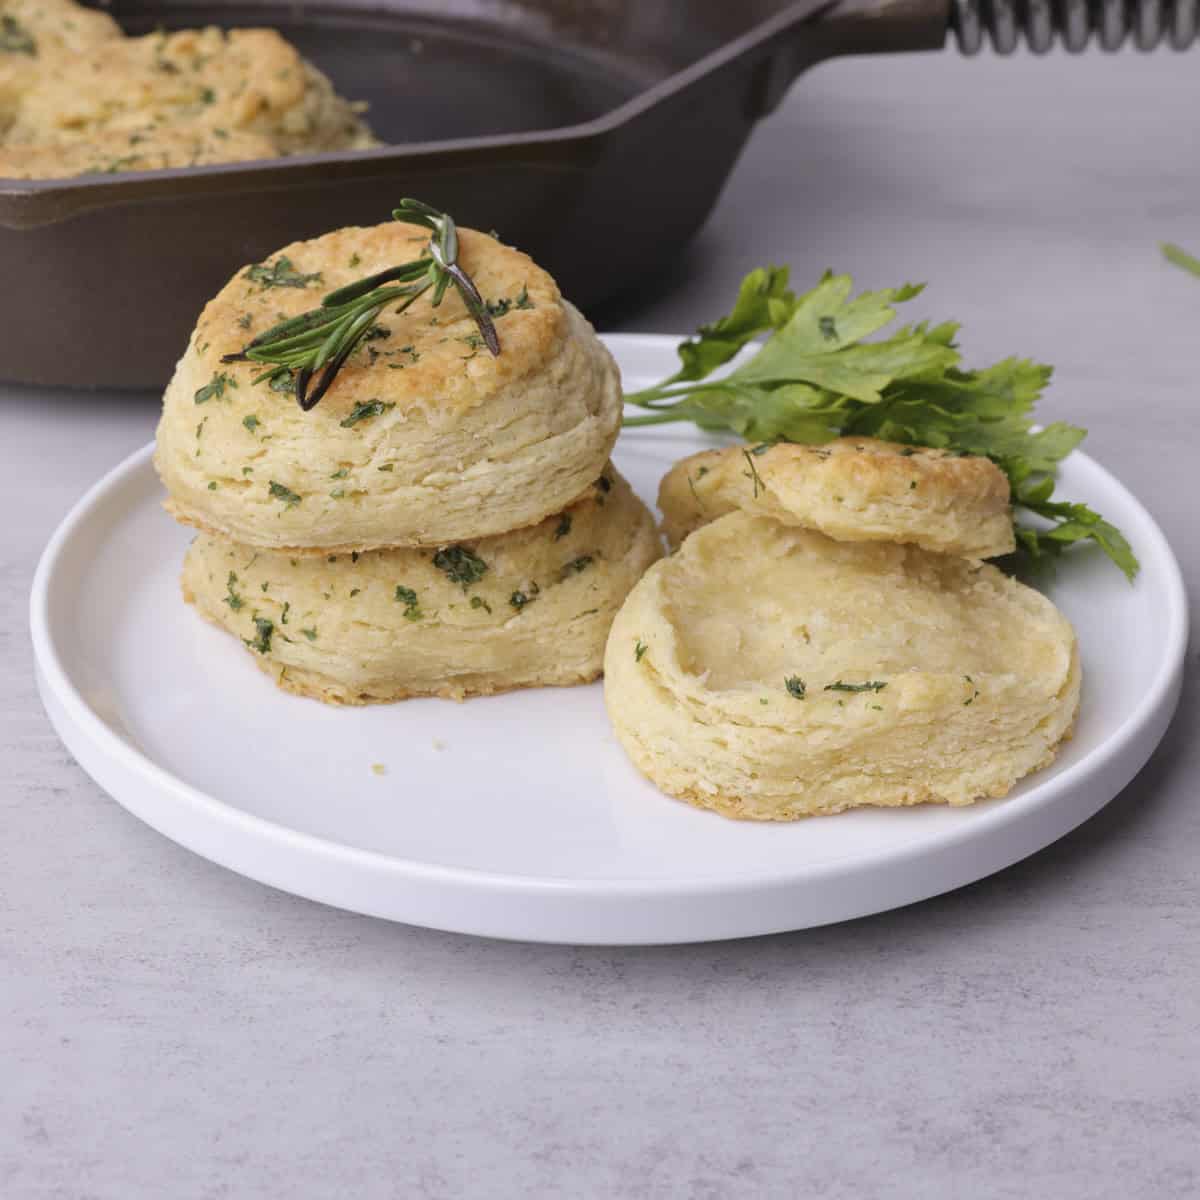
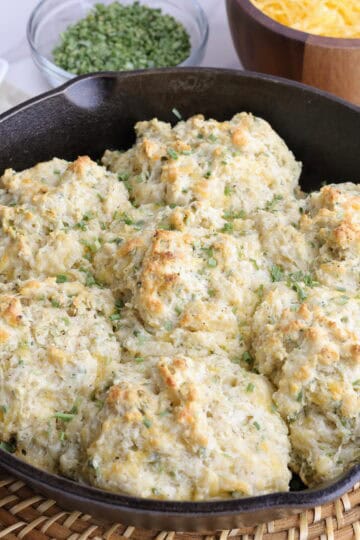
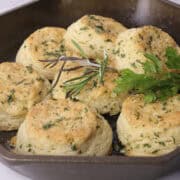
There is nothing better than warm, flaky biscuits fresh from the oven, especially when they're baked in a hot skillet for crisp edges and golden tops. These Skillet Biscuits are folded to create buttery, tender layers and come together in just 30 minutes, making them perfect for any meal. Finish them with a brush of melted garlic butter for an easy upgrade that turns them into irresistible, pull-apart garlic bread.
Why I Love This
- Last Minute Bread: How often have I been in the middle of making supper only to realize it needs one more addition and bread would be perfect but I need it done in 30 minutes. These are that bread!
- Garlic Bread in Minutes: These turn into perfect garlic bread in seconds, pairing perfectly with that delicious pasta dish you're whipping up. A brush of garlic butter on top (included in the recipe) and you're good to go - no extra fuss needed.
- Just like Store Bought: I have to admit that I kinda love those store bought, ready-to-bake biscuits but I wanted a healthier option. These are folded to create the same delicate, pull-apart layers and still have the buttery taste we all love.
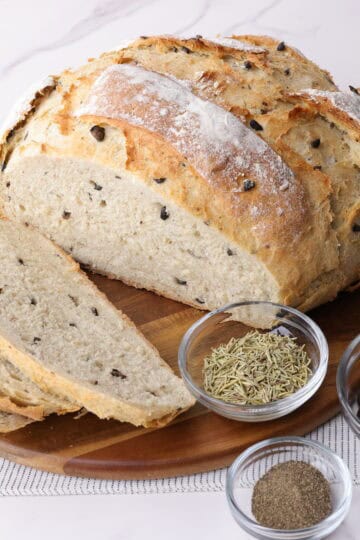
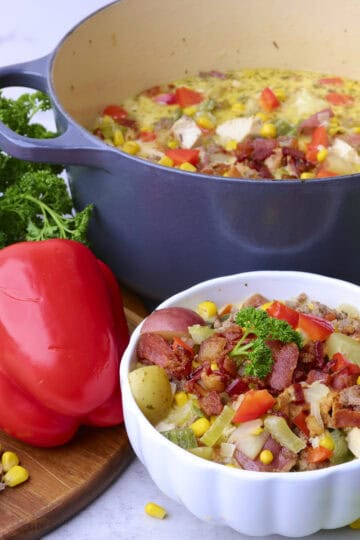
Try my Cheddar Chive Drop Biscuit recipe for another quick and tasty option. Pair either of these amazing breads with my Sausage and Pepper Soup or my Blackened Salmon Alfredo for a hearty and warm meal.
Jump to:
Ingredients
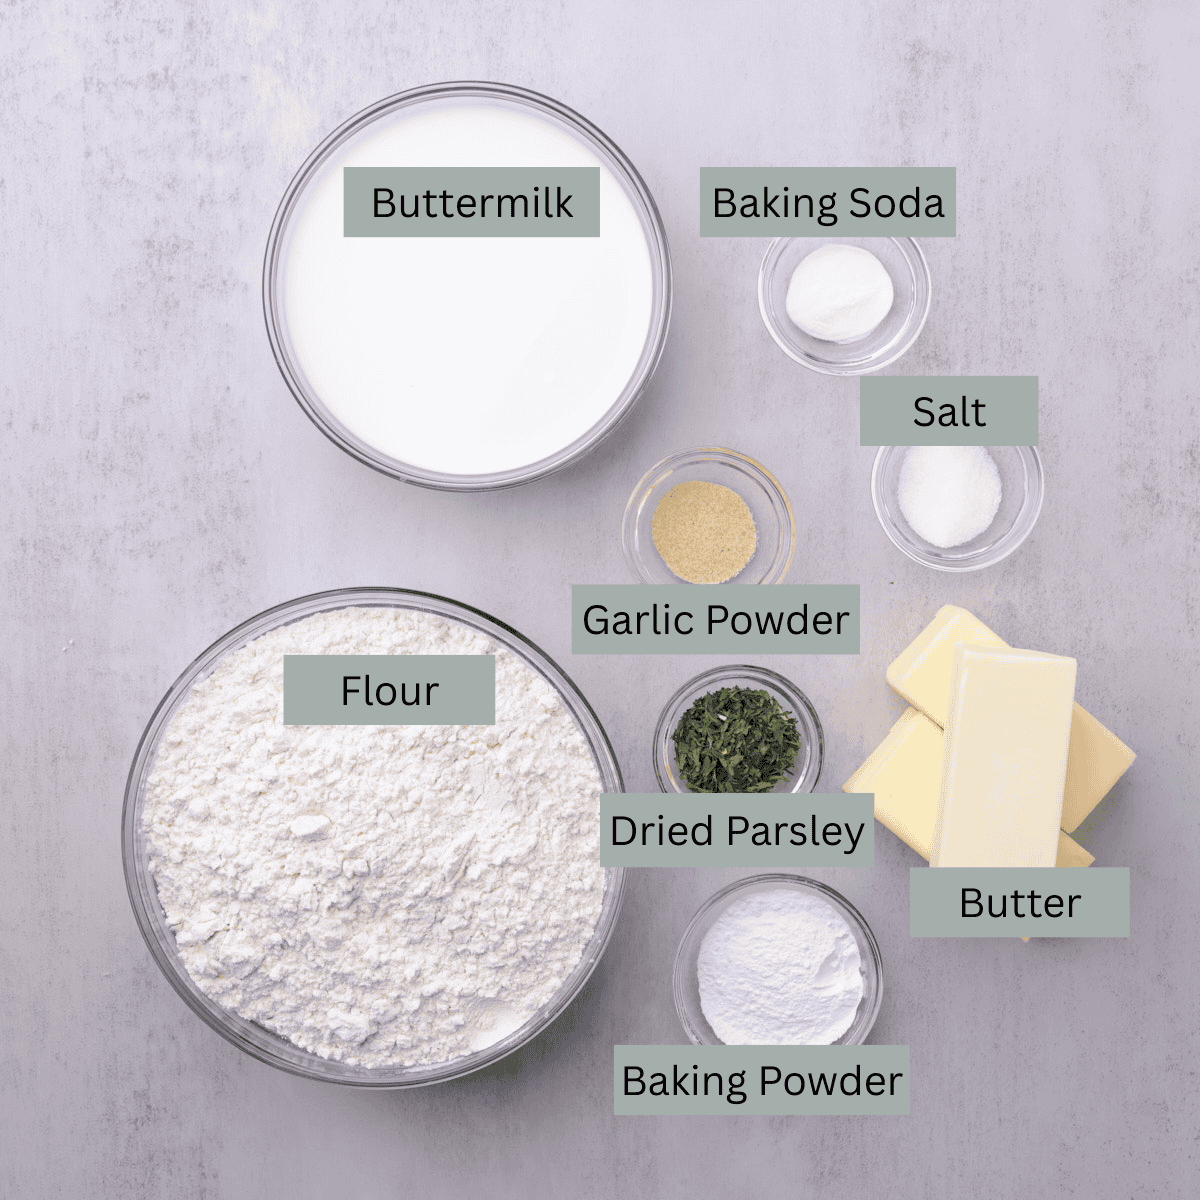
- All Purpose Flour - I use a simple all purpose flour for this recipe but bread flour would work great too and give you a deliciously tender biscuit.
- Baking Power and Soda - both leavening agents help create the perfect rise and react with the buttermilk.
- Buttermilk - you can use plain milk or a milk alternative but it won't have the same flavor. You can create your own buttermilk but adding 1-2 teaspoons into your milk and letting it rest for 5 minutes before adding it to your flour.
- Butter - it is ESSENTIAL that your butter is frozen for this recipe to really turn out. It's a small labor of love to grate it, I know, but the result is so worth it.
See recipe card for quantities.
Instructions
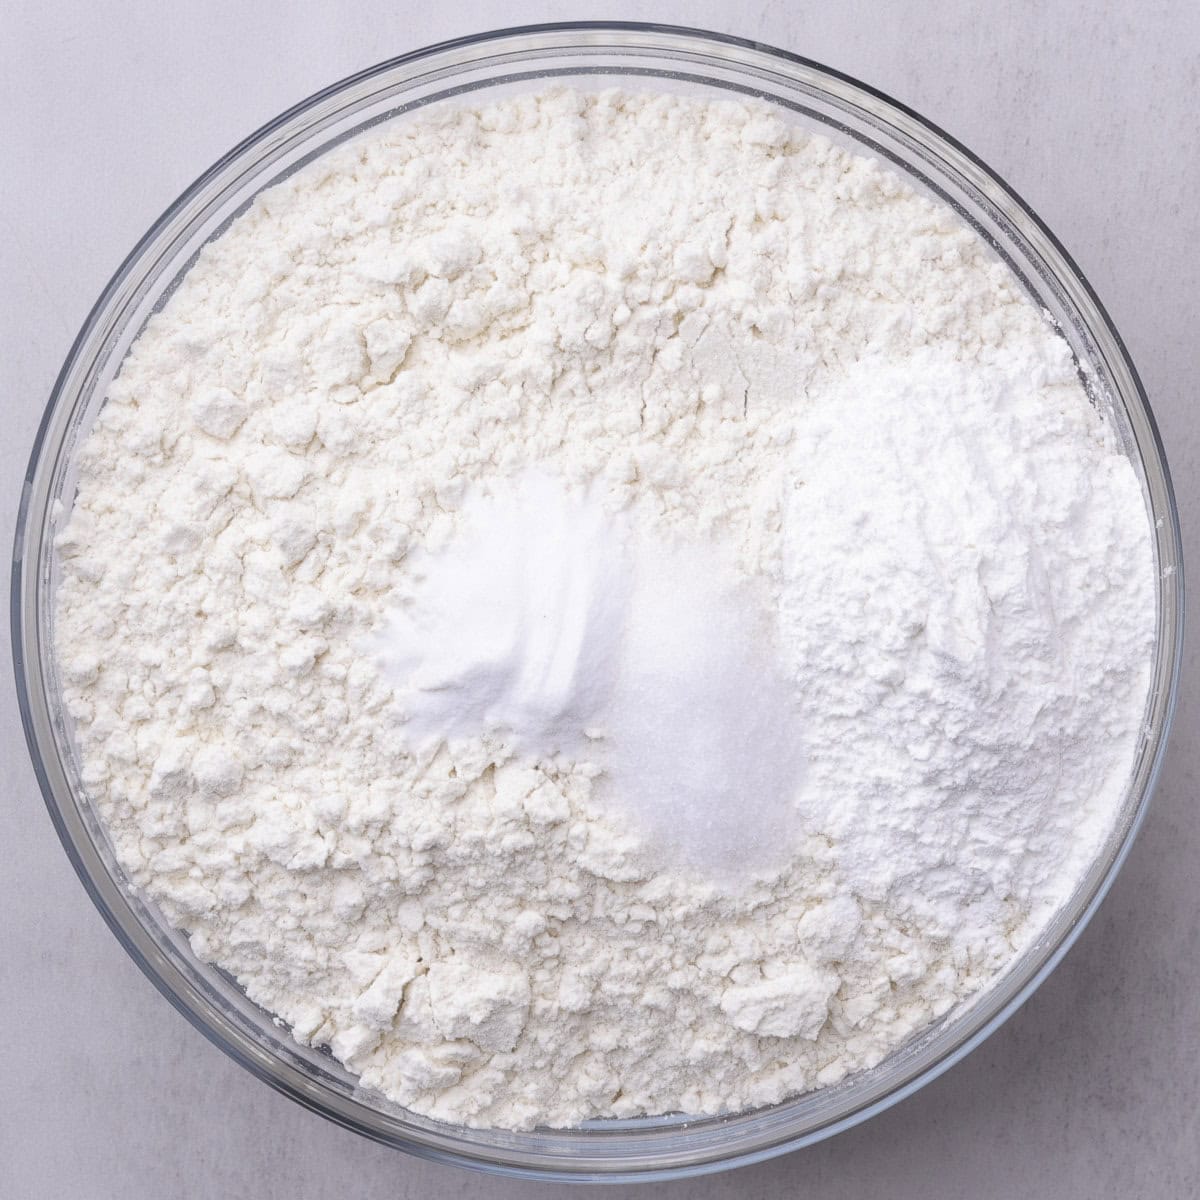
Step 1: In a large bowl, whisk together all of the dry ingredients.
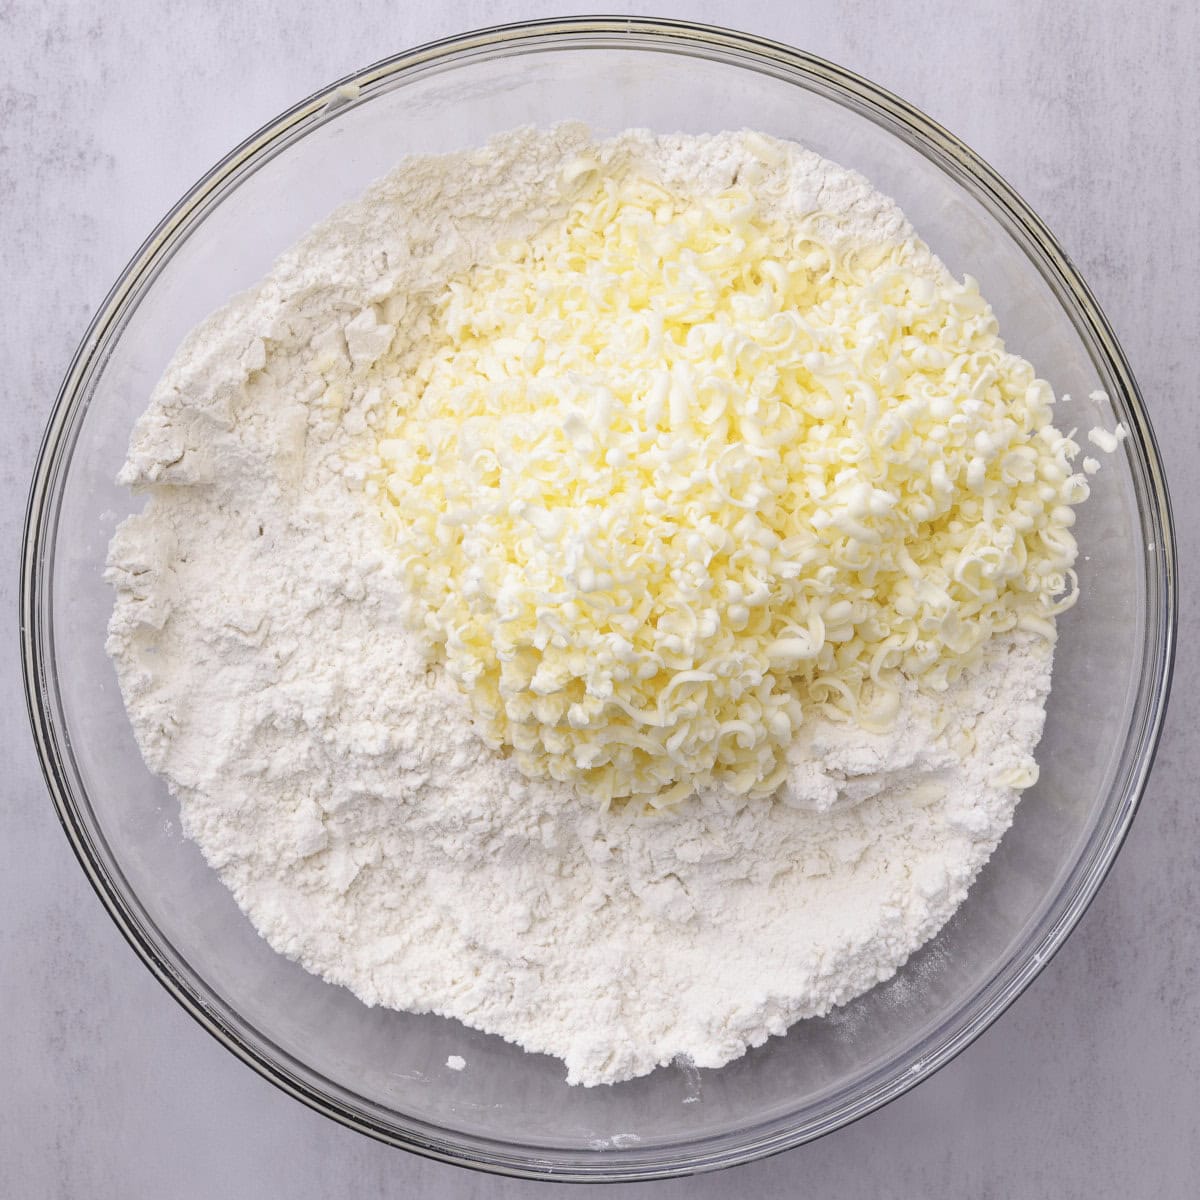
Step 2: Grate the frozen butter directly into the dry ingredients. Use your fingers to gently toss and rub the butter into the flour until the mixture looks crumbly with visible bits of butter.
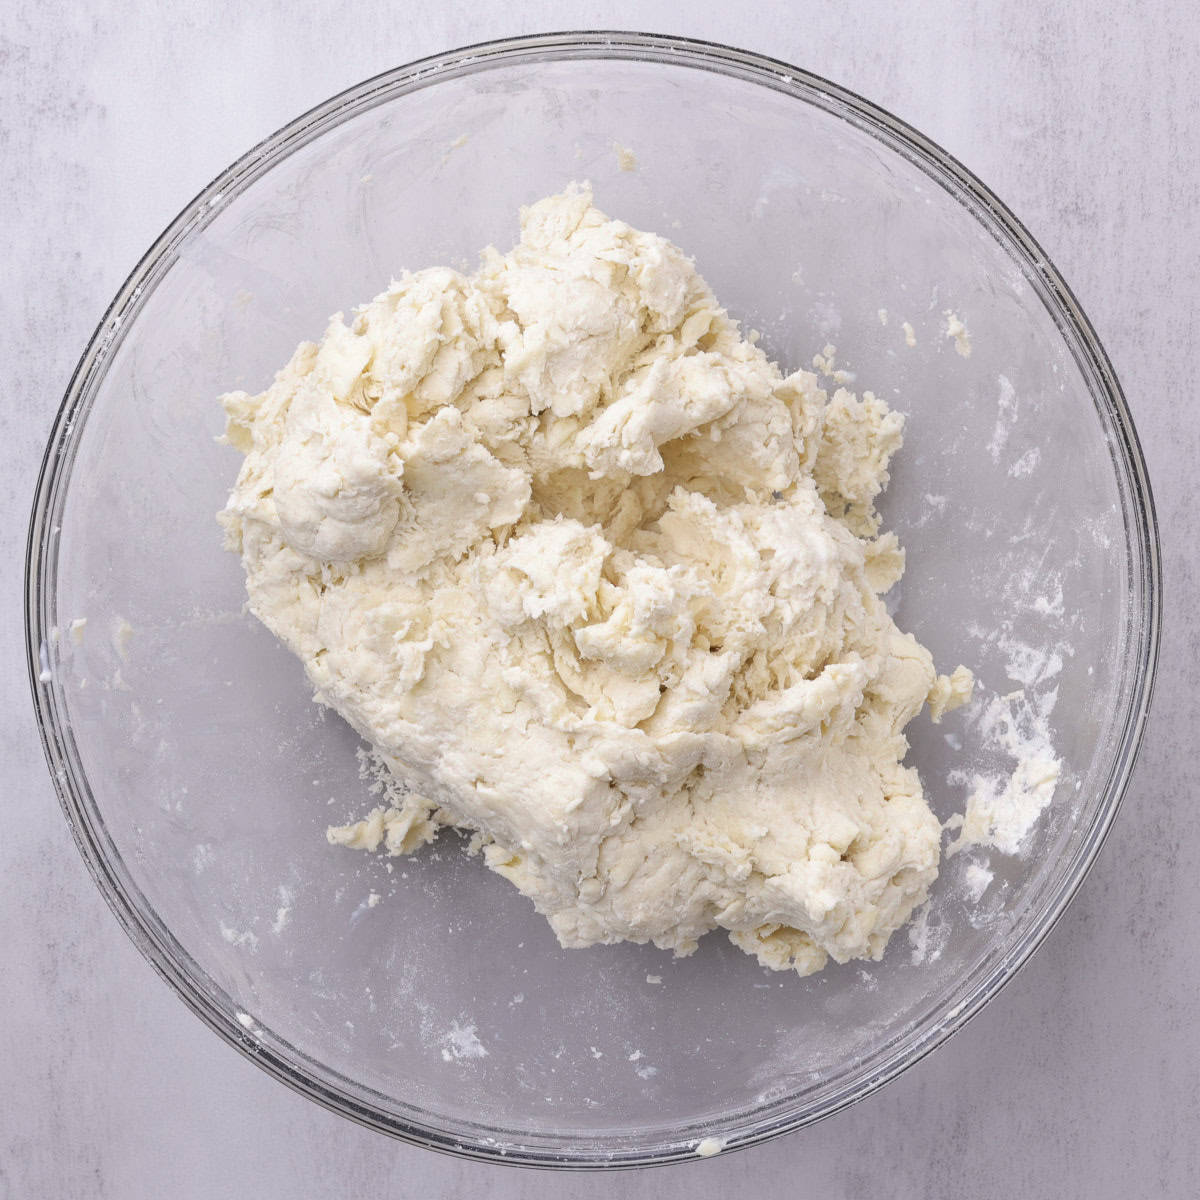
Step 3: Pour in the buttermilk and mix just until a shaggy dough forms. Using your hands works best. Do not overwork the dough.
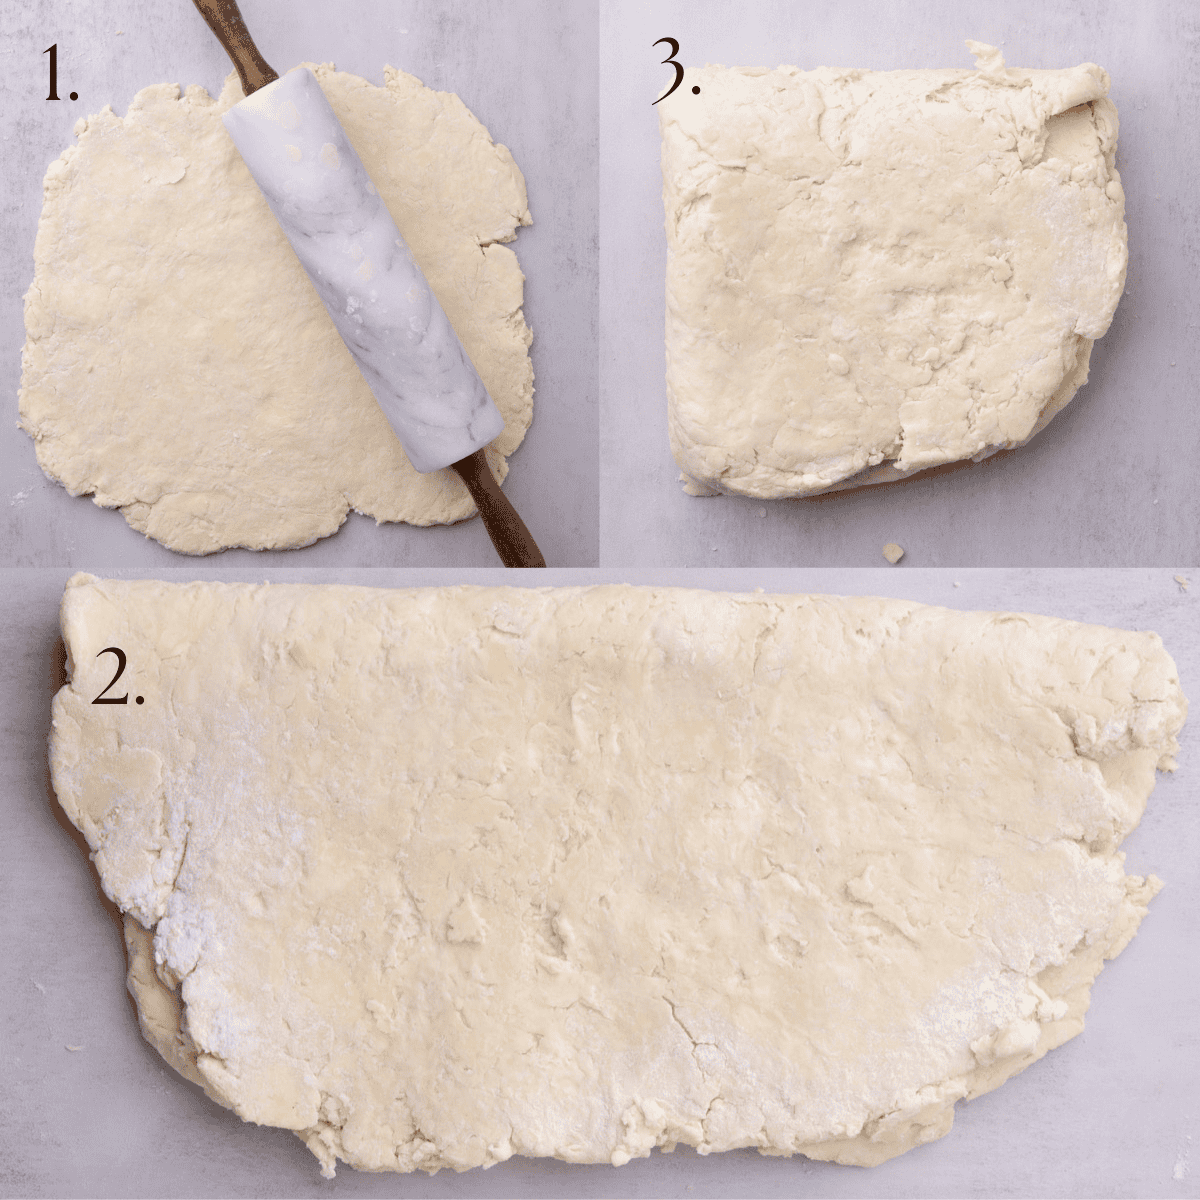
Step 4: Turn the dough out onto a lightly floured surface and gently roll it into a square about ½-inch thick. Fold the dough in half, then in half again. Roll it back out to ½-inch thick square and repeat the folding once more (completing the image series twice).
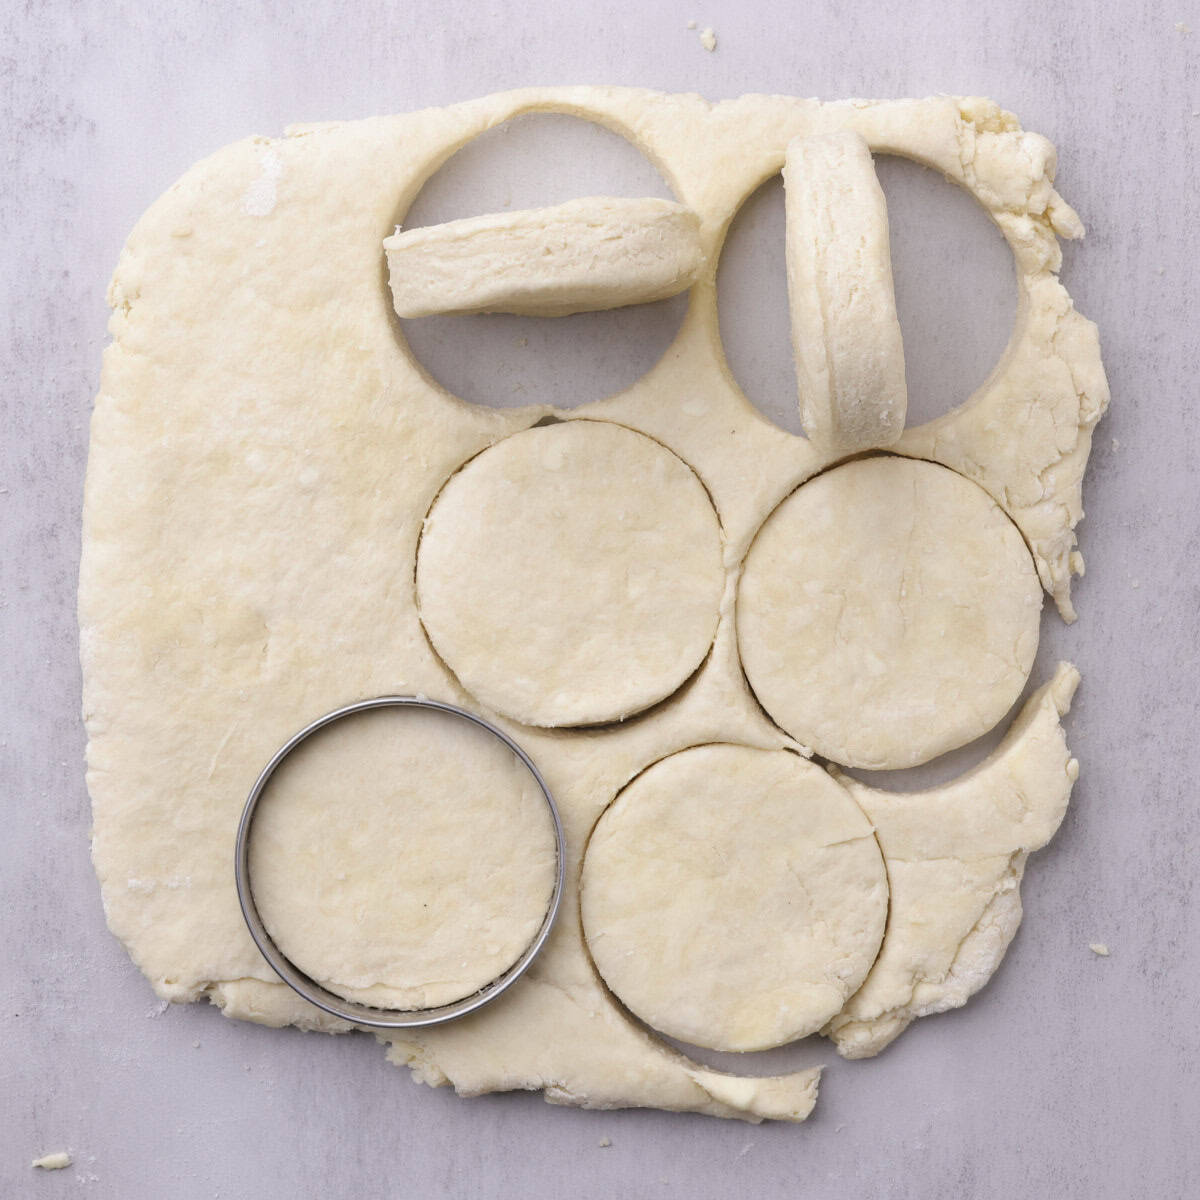
Step 5: Roll the dough out to about ¾-inch thick. Using a round biscuit cutter or drinking glass, cut out the biscuits by pressing straight down - do not twist, as this can prevent the layers from rising. Gather the scraps, re-roll gently, and cut, repeating until all the dough is used.
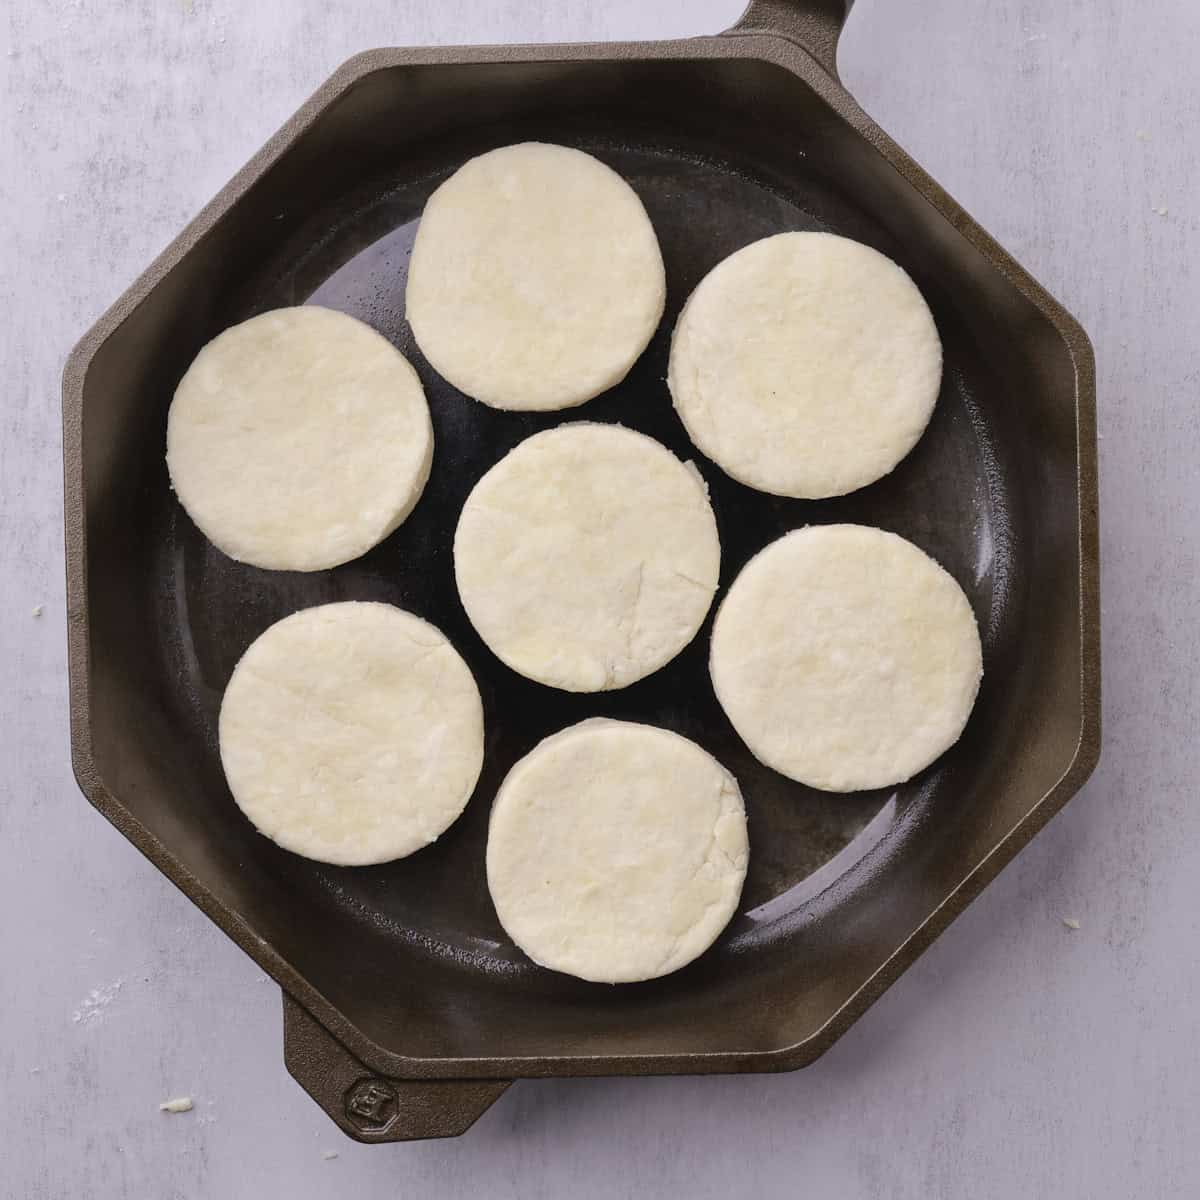
Step 6: Place the biscuits into the skillet or lightly greased baking dish of similar size. Cover and refrigerate for 10-20 minutes.
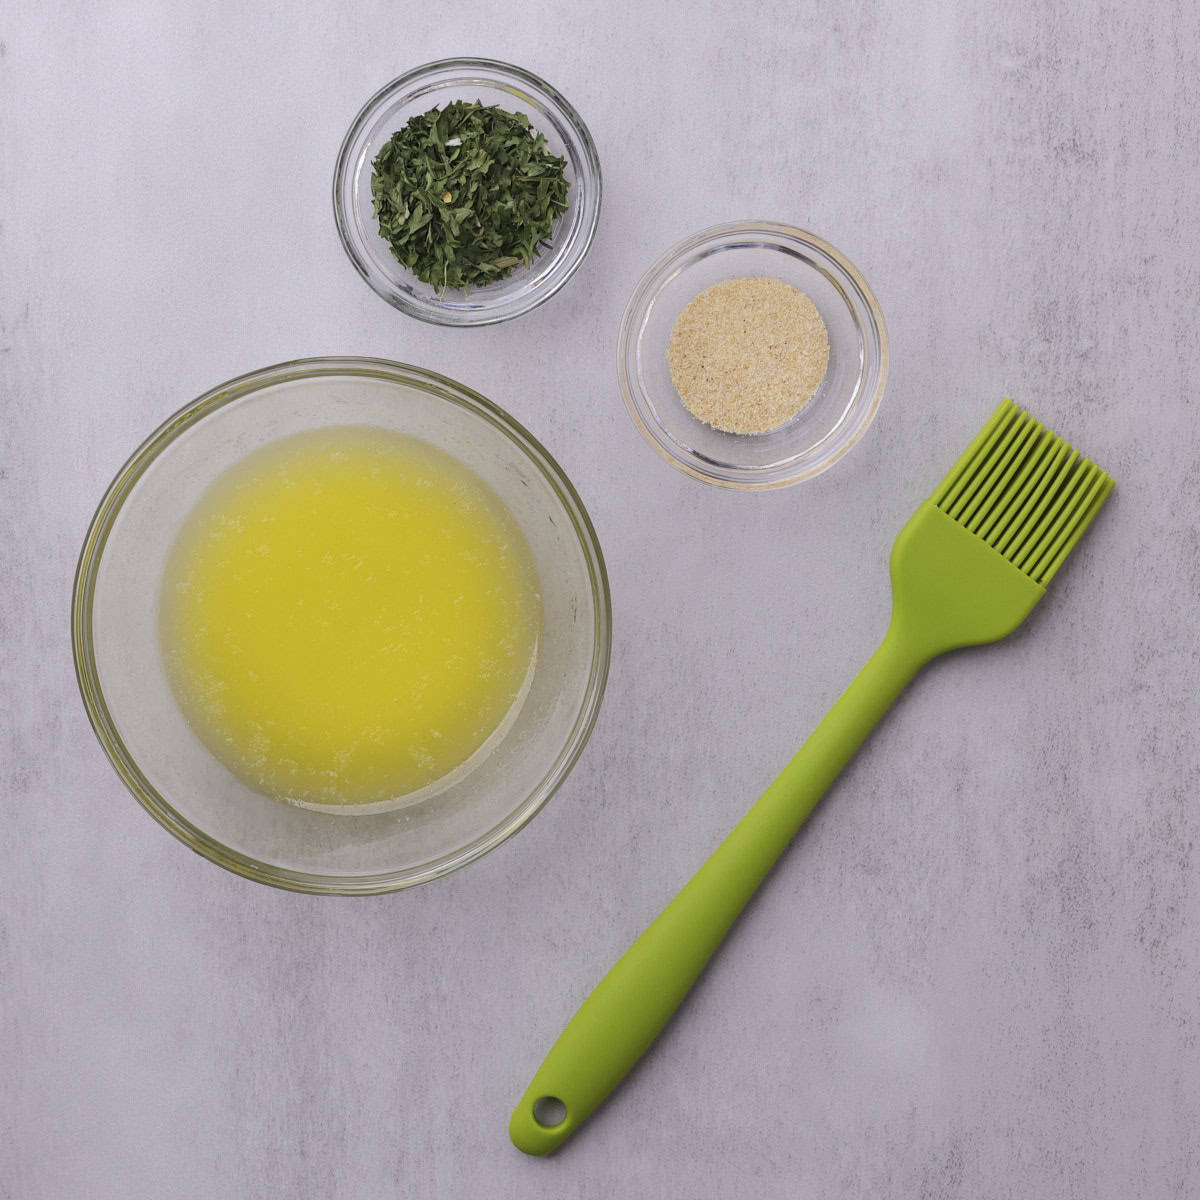
Step 7: Meanwhile, melt the butter for the topping in a small bowl. Stir in the garlic powder and parsley until combined. Set aside.
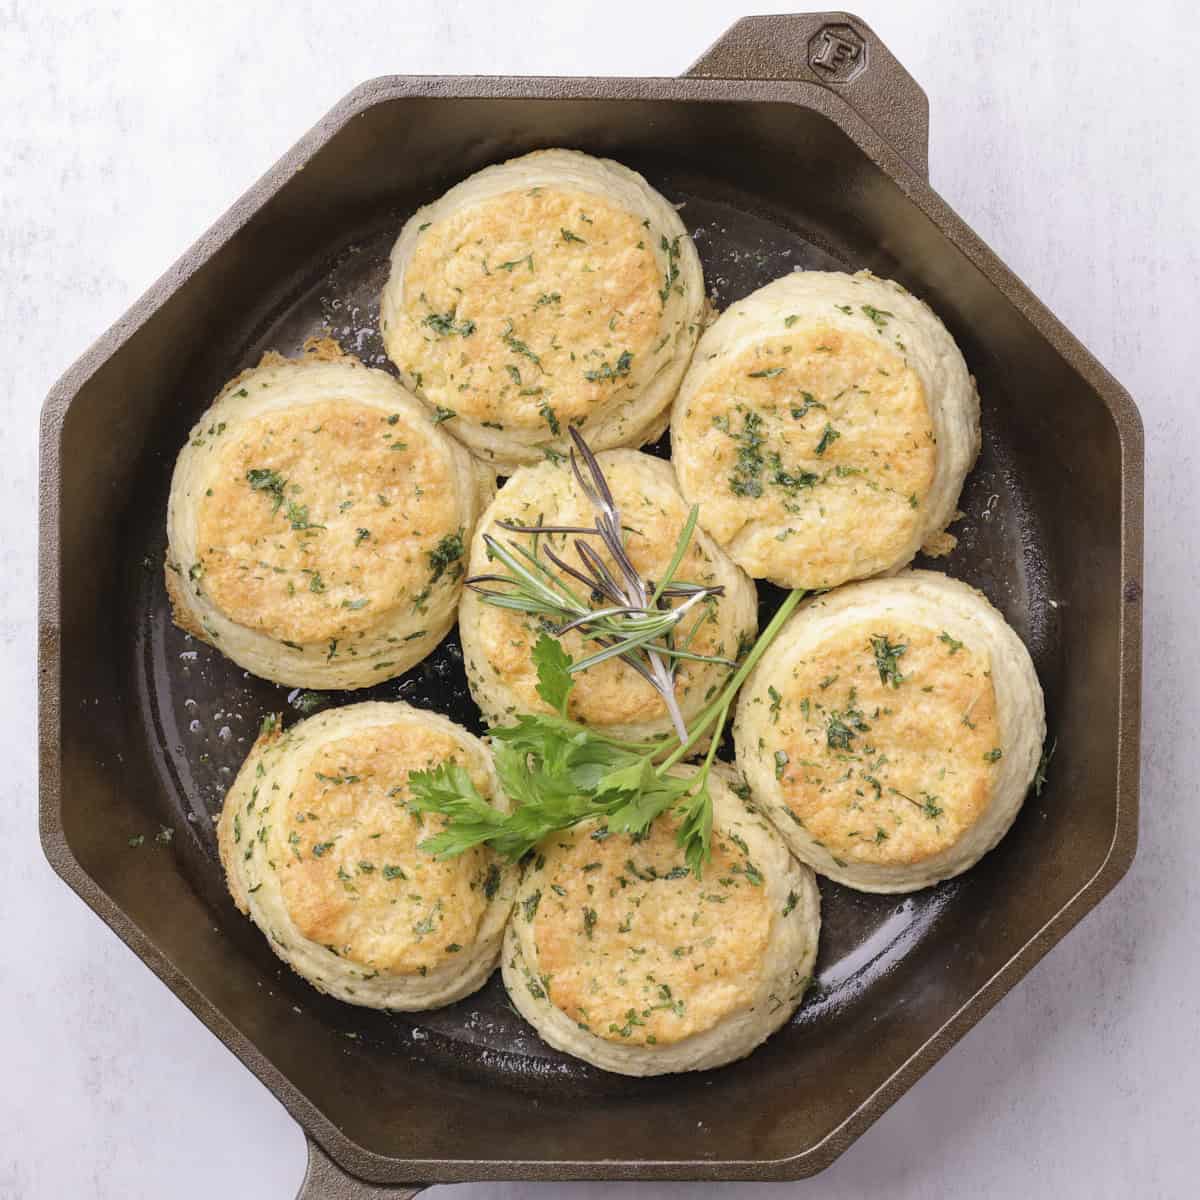
Step 8: Bake at 425°F for 15-18 minutes or until the tops are golden brown. Brush with garlic butter (or plain melted butter) and serve warm.
Hint: Place your biscuits in the skillet so that they are touching to create more pull-apart style bread. They'll still rise beautifully and have those amazing layers.
Substitutions
- Gluten Free - you can have great success using a 1-to-1 gluten free flour for these Skillet Biscuits.
- Dairy Free - you can use an unsalted dairy-free "butter" and "milk" for these and get a similar result. They may not be as fluffy or laminate quite as well and you may need to place them in the fridge or freezer a couple time during the lamination process to keep the butter cold.
Variations
- Bold Garlic - wanting more garlic? Try adding 1-2 teaspoon of minced garlic and ½ teaspoon of pepper to the dry ingredients before forming the dough. Then brush the tops with the garlic butter after they bake as usual.
- Cheddar! - make these cheddar garlic biscuits by shredding some sharp cheddar cheese into the dry ingredients before forming the dough.
- Sweet Side - instead of brushing the tops with garlic butter, brush with plain butter and then serve with your favorite jams or honey.
Pair these Skillet Biscuits with my Skillet Meatloaf or my Salmon and Goat Cheese with Blueberries for a more deluxe style meal.
Equipment
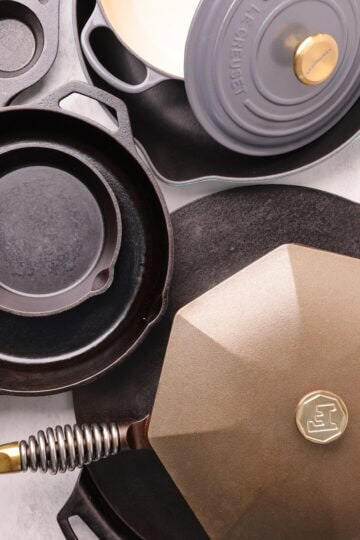
I have used a 12" brushed bottom skillet here made by Finex. You can also you a raw cast iron skillet or an enameled one. Just ensure the handle is oven safe. Alternatively, you can use a similar sized glass or ceramic baking dish, you just won't get the same crisping around the edges and on the bottom. If you choose this option you may want to consider lining it with parchment paper or lightly greasing it.
Storage
The first few days: These Skillet Biscuits can be stored in an airtight container or bag on the counter for 2-3 days. Popping them in the fridge is also a great option.
Freezing: These biscuits freeze so well! This is a great make-ahead option! Place in an airtight container or bag and freeze up to 3 months.
Reheating/Thawing: Simply leave the biscuits on the counter in their bag or container until they reach room temperature. To bring them back to life, slice them in half and pop them in the toaster for 30-60 seconds.
Top Tip
Refrain from overworking the dough. It;s tempting to mix until everything looks smooth and fully incorporated, but this dough is worked further during the lamination process. As you roll, fold and roll again, the flour, butter and milk will continue to come together naturally. Overworking the biscuit dough leads to dense, heavy biscuits that don't rise well. A shaggy dough is exactly what you're aiming for.
Make Ahead Tips
These Skillet Biscuits are perfect for making ahead, whether you want to save time on busy weeknights or prep in advance for a holiday meal.
Follow the recipe as written until the biscuits are cut. Place the cut biscuits in an airtight container and store them in the refrigerator for up to 24 hours or freeze them for up to 3 months.
When ready to bake, transfer the biscuits directly to your skillet or baking dish and bake as directed, adding a few extra minutes if baking from frozen. If freezing, do not thaw before baking - we want that butter cold for the flakiest biscuits!
FAQ
Lamination is the simple technique where dough is rolled out and folded over itself to create thin layers of dough and butter. As the biscuits bake, the butter melts and helps separate those layers, giving you flaky, tender biscuits instead of dense dough.
You can but the biscuits won't be as flaky or tender and may not rise as well. If you are short on time even a single fold will help create some layers.
Frozen butter is highly recommended for these Skillet Biscuits as it stays cold longer and creates the best layers. Cold butter works too but frozen makes the most flaky biscuits.
Yes you can. Buttermilk is used to add more flavor and extra tenderness to the biscuits. You can create your own buttermilk by adding 1-2 teaspoons of vinegar or lemon juice to your milk and letting it sit for 5 minutes before adding it to your batter.
Related
Looking for other recipes like this? Try these:
Most Recent
Try these new Alaskan Skillet favorites!
Print

Skillet Biscuits
- Total Time: 30-48 minutes
- Yield: 8 biscuits 1x
Description
There is nothing better than warm, flaky biscuits fresh from the oven, especially when they're baked in a hot skillet for crisp edges and golden tops. These Skillet Biscuits are folded to create buttery, tender layers and come together in just 30 minutes, making them perfect for any meal. Finish them with a brush of melted garlic butter for an easy upgrade that turns them into irresistible, pull-apart garlic bread.
Ingredients
For the Biscuits:
3 cups (400 grams) all purpose flour
1 ½ tablespoons (17 grams) baking powder
½ teaspoon (3 grams) baking soda
¾ teaspoon (3 grams) salt
1 cup (8 ounces) frozen butter* I prefer unsalted
1 cup (240 milliliters) buttermilk*
For the Topping:
3 tablespoons (1.5 ounces) butter melted
1 teaspoon (3 grams) garlic powder
1 teaspoon dried parsley
pinch of salt
Instructions
- In a large bowl, whisk together all of the dry ingredients.
- Grate the frozen butter directly into the dry ingredients. Use your fingers to gently toss and rub the butter into the flour until the mixture looks crumbly with visible bits of butter.
- Pour in the buttermilk and mix just until a shaggy dough forms. Using your hands works best. Do not overwork the dough.
- Turn the dough out onto a lightly floured surface and gently roll it into a square about ½-inch thick. Fold the dough in half, then in half again. Roll it back out to ½-inch thickness and repeat the folding once more.
- Roll the dough out to about ¾-inch thick. Using a round biscuit cutter or drinking glass, cut out the biscuits by pressing straight down - do not twist, as this can prevent the layers from rising. Gather the scraps, re-roll gently, and cut until all the dough is used.. Be sure to press straight down and do not twist as this will hinder the layers forming. Bring remaining dough together, roll and cut out until all the dough is used.
- Place the biscuits into the skillet or lightly greased baking dish of similar size. Cover and refrigerate for 10-20 minutes.*
- Meanwhile, melt the butter for the topping in a small bowl. Stir in the garlic powder and parsley until combined. Set aside.
- Bake at 425°F for 15-18 minutes or until the tops are golden brown. Brush with garlic butter (or plain melted butter) and serve warm.
*All nutritional information is an estimation only. Exact nutritional value depends on exact amounts and ingredients used.
Notes
You can make your own buttermilk by adding about 1 tablespoon of vinegar or lemon juice to your milk (dairy or dairy-free) and allowing it to sit for 5 minutes before adding it to your mixture.
You can use cold butter instead of frozen butter and cut it into your flour instead of grating it but you won't get as good of layers or as flaky of biscuits.
6. This is a great place to stop and store your biscuits for later if desired. You can refrigerate them for up to 24 hours or freeze them for up to 3 months in an airtight container. Bake as directed adding a few extra minutes if baking from frozen. Do not thaw before baking if freezing them.
- Prep Time: 5-10 minutes
- Cooling time: 10-20 minutes
- Cook Time: 15-18 minutes
- Category: Bread
- Method: Bake
- Cuisine: American
Jenice Wallace says
I love how flavorful, flaky and tender these biscuits are! They are perfect with butter and jam or can be turned into garlic bread with the sweep of a brush. Delicious no matter how you share them and the perfect side!