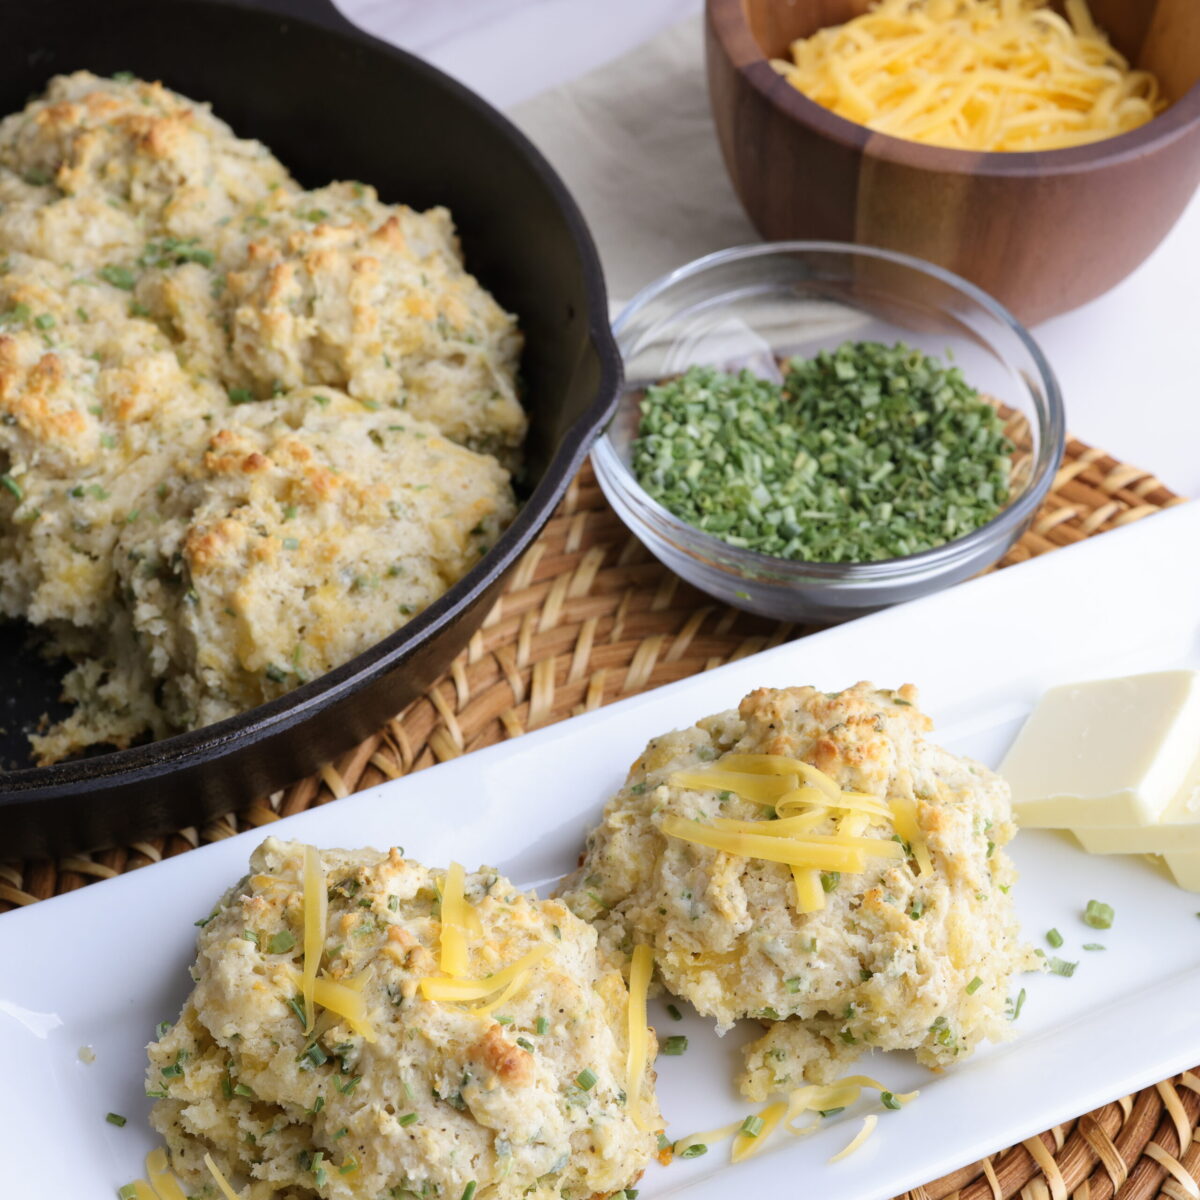
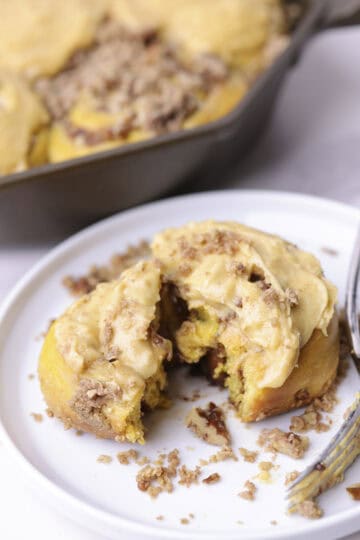
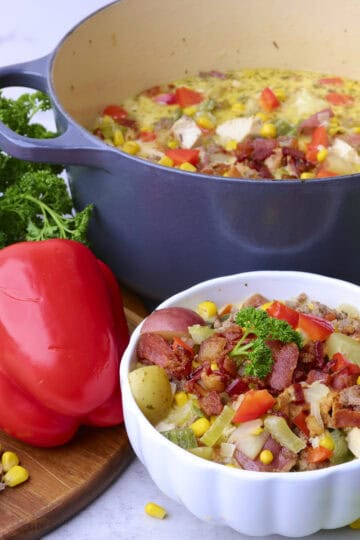
The light taste of garlic with the subtly of the chives and sharpness of the cheddar ring out the chorus of a perfected trio. These Cheddar Cheese Chive Biscuits are quick, no mess and flavored for fullness but not to overpower, making them a go-to side dish for pastas, soups, salads and more.
Why I Love This
- The Perfect Side: Biscuits are the perfect addition to so many meals. How many times have I looked at what I was preparing and felt something was missing, only to realize that biscuits were the perfect gap filler. But then who wants plain old biscuits? Well, sometimes those are best, lathered with butter and jam… so delicious. But sometimes it's fun to spice it up a bit and add a little excitement to that perfect side to make it that little more special. That's these biscuits.
- Simple and Easy: These drop biscuits are so simple and easy. One bowl, one spoon and a couple measuring cups is all you need. They create virtually no mess as there's no need to roll them out and cut them into rounds, simply drop them right in the pan and then straight into the oven. So incredibly simple, so incredibly satisfying.
- Perfectly Flavored: Since these Cheddar Cheese and Chive drop biscuits are meant to be a side dish, I flavor them to be aromatic but not overpowering. They're not meant to steal the spotlight, but to enhance the star and shine as the perfect costar-which they do effortlessly.
Pair these biscuits with my Homemade Alfredo Sauce with Cream Cheese or my Blackened Salmon Alfredo recipe and for an extra kick try my Spicy Alfredo Sauce recipe.
Jump to:
Ingredients
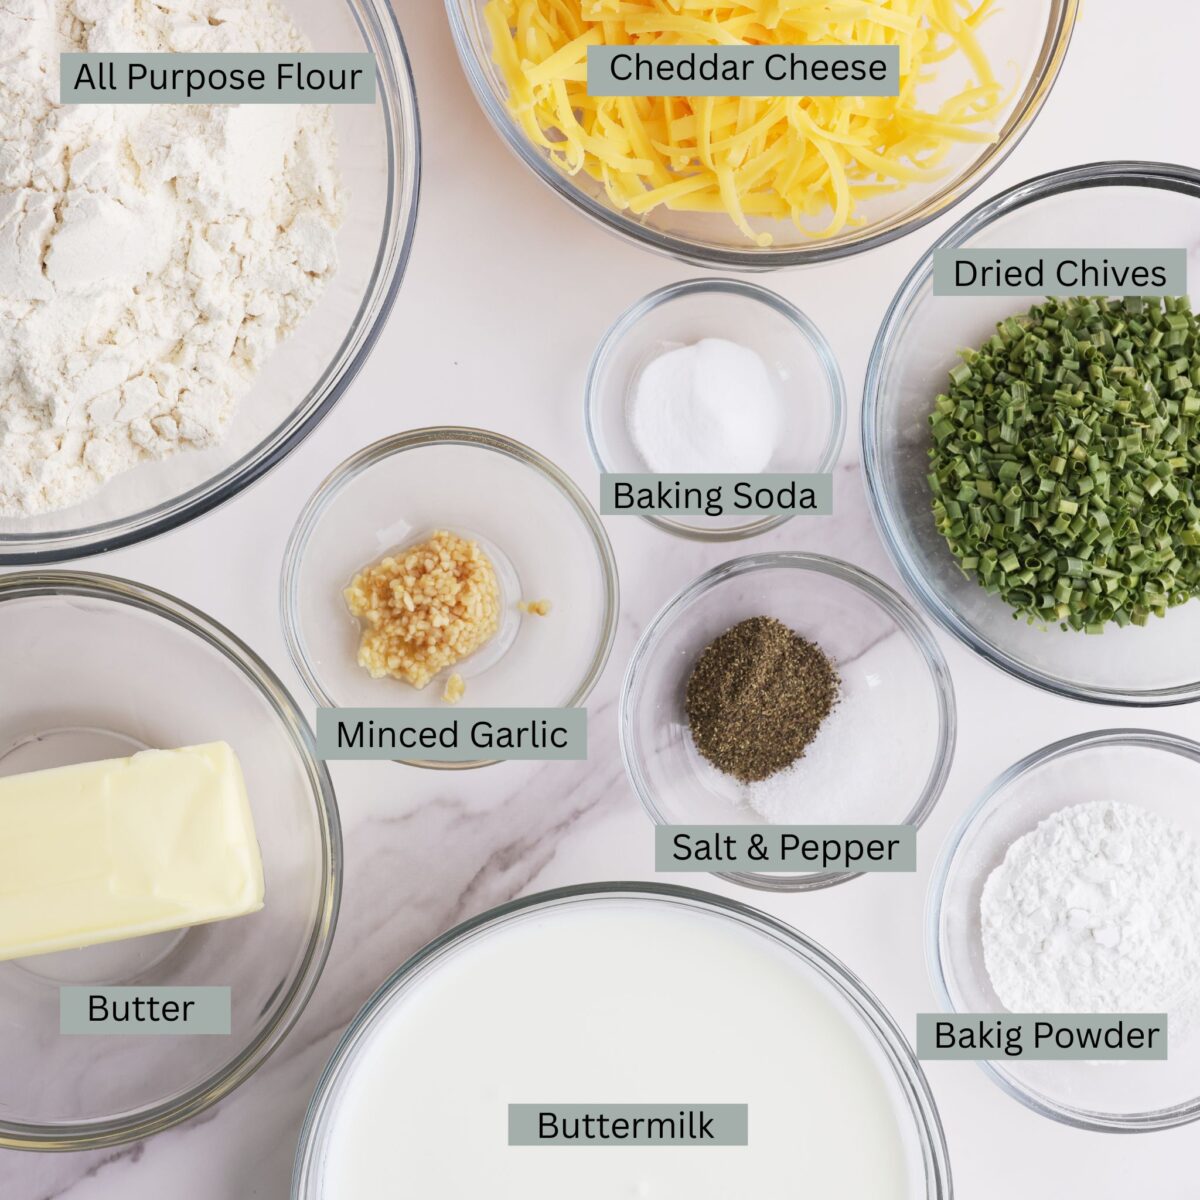
- All-purpose flour: The base that everything else adds to.
- Unsalted butter (cold): I like to use unsalted butter and then control how much I add in. You also need to have your butter cold to get the best biscuits. I mean straight out of the fridge, cold. Anything less will melt into your flour and won't give you the same flakiness that we all love in a biscuit.
- Baking powder: The primary rising agent.
- Baking soda: A secondary rising agent that reacts with the buttermilk.
- Salt: This adds just a touch of extra flavor.
- Pepper: It has just enough pepper for flavor without adding heat, making it mild but still tasty. I find this is important as it is a side dish, not a main dish.
- Minced garlic: I like to use minced garlic as I find it to be a more "true" garlic flavor than garlic powder.
- Cheddar cheese: You can use any variety of cheddar cheese you like but I prefer a sharp or extra sharp to get the most flavor out of it.
- Dried chives: I use dried chives since they're always on hand-perfect for whipping these up last minute.
- Buttermilk: Buttermilk is essentially soured milk. If you don't have this simply add 1-2 teaspoons of vinegar to your milk and let it sit for 5 minutes. You can use regular milk or cream but I find the buttermilk to give a much better flavor.
See recipe card for quantities.
Instructions
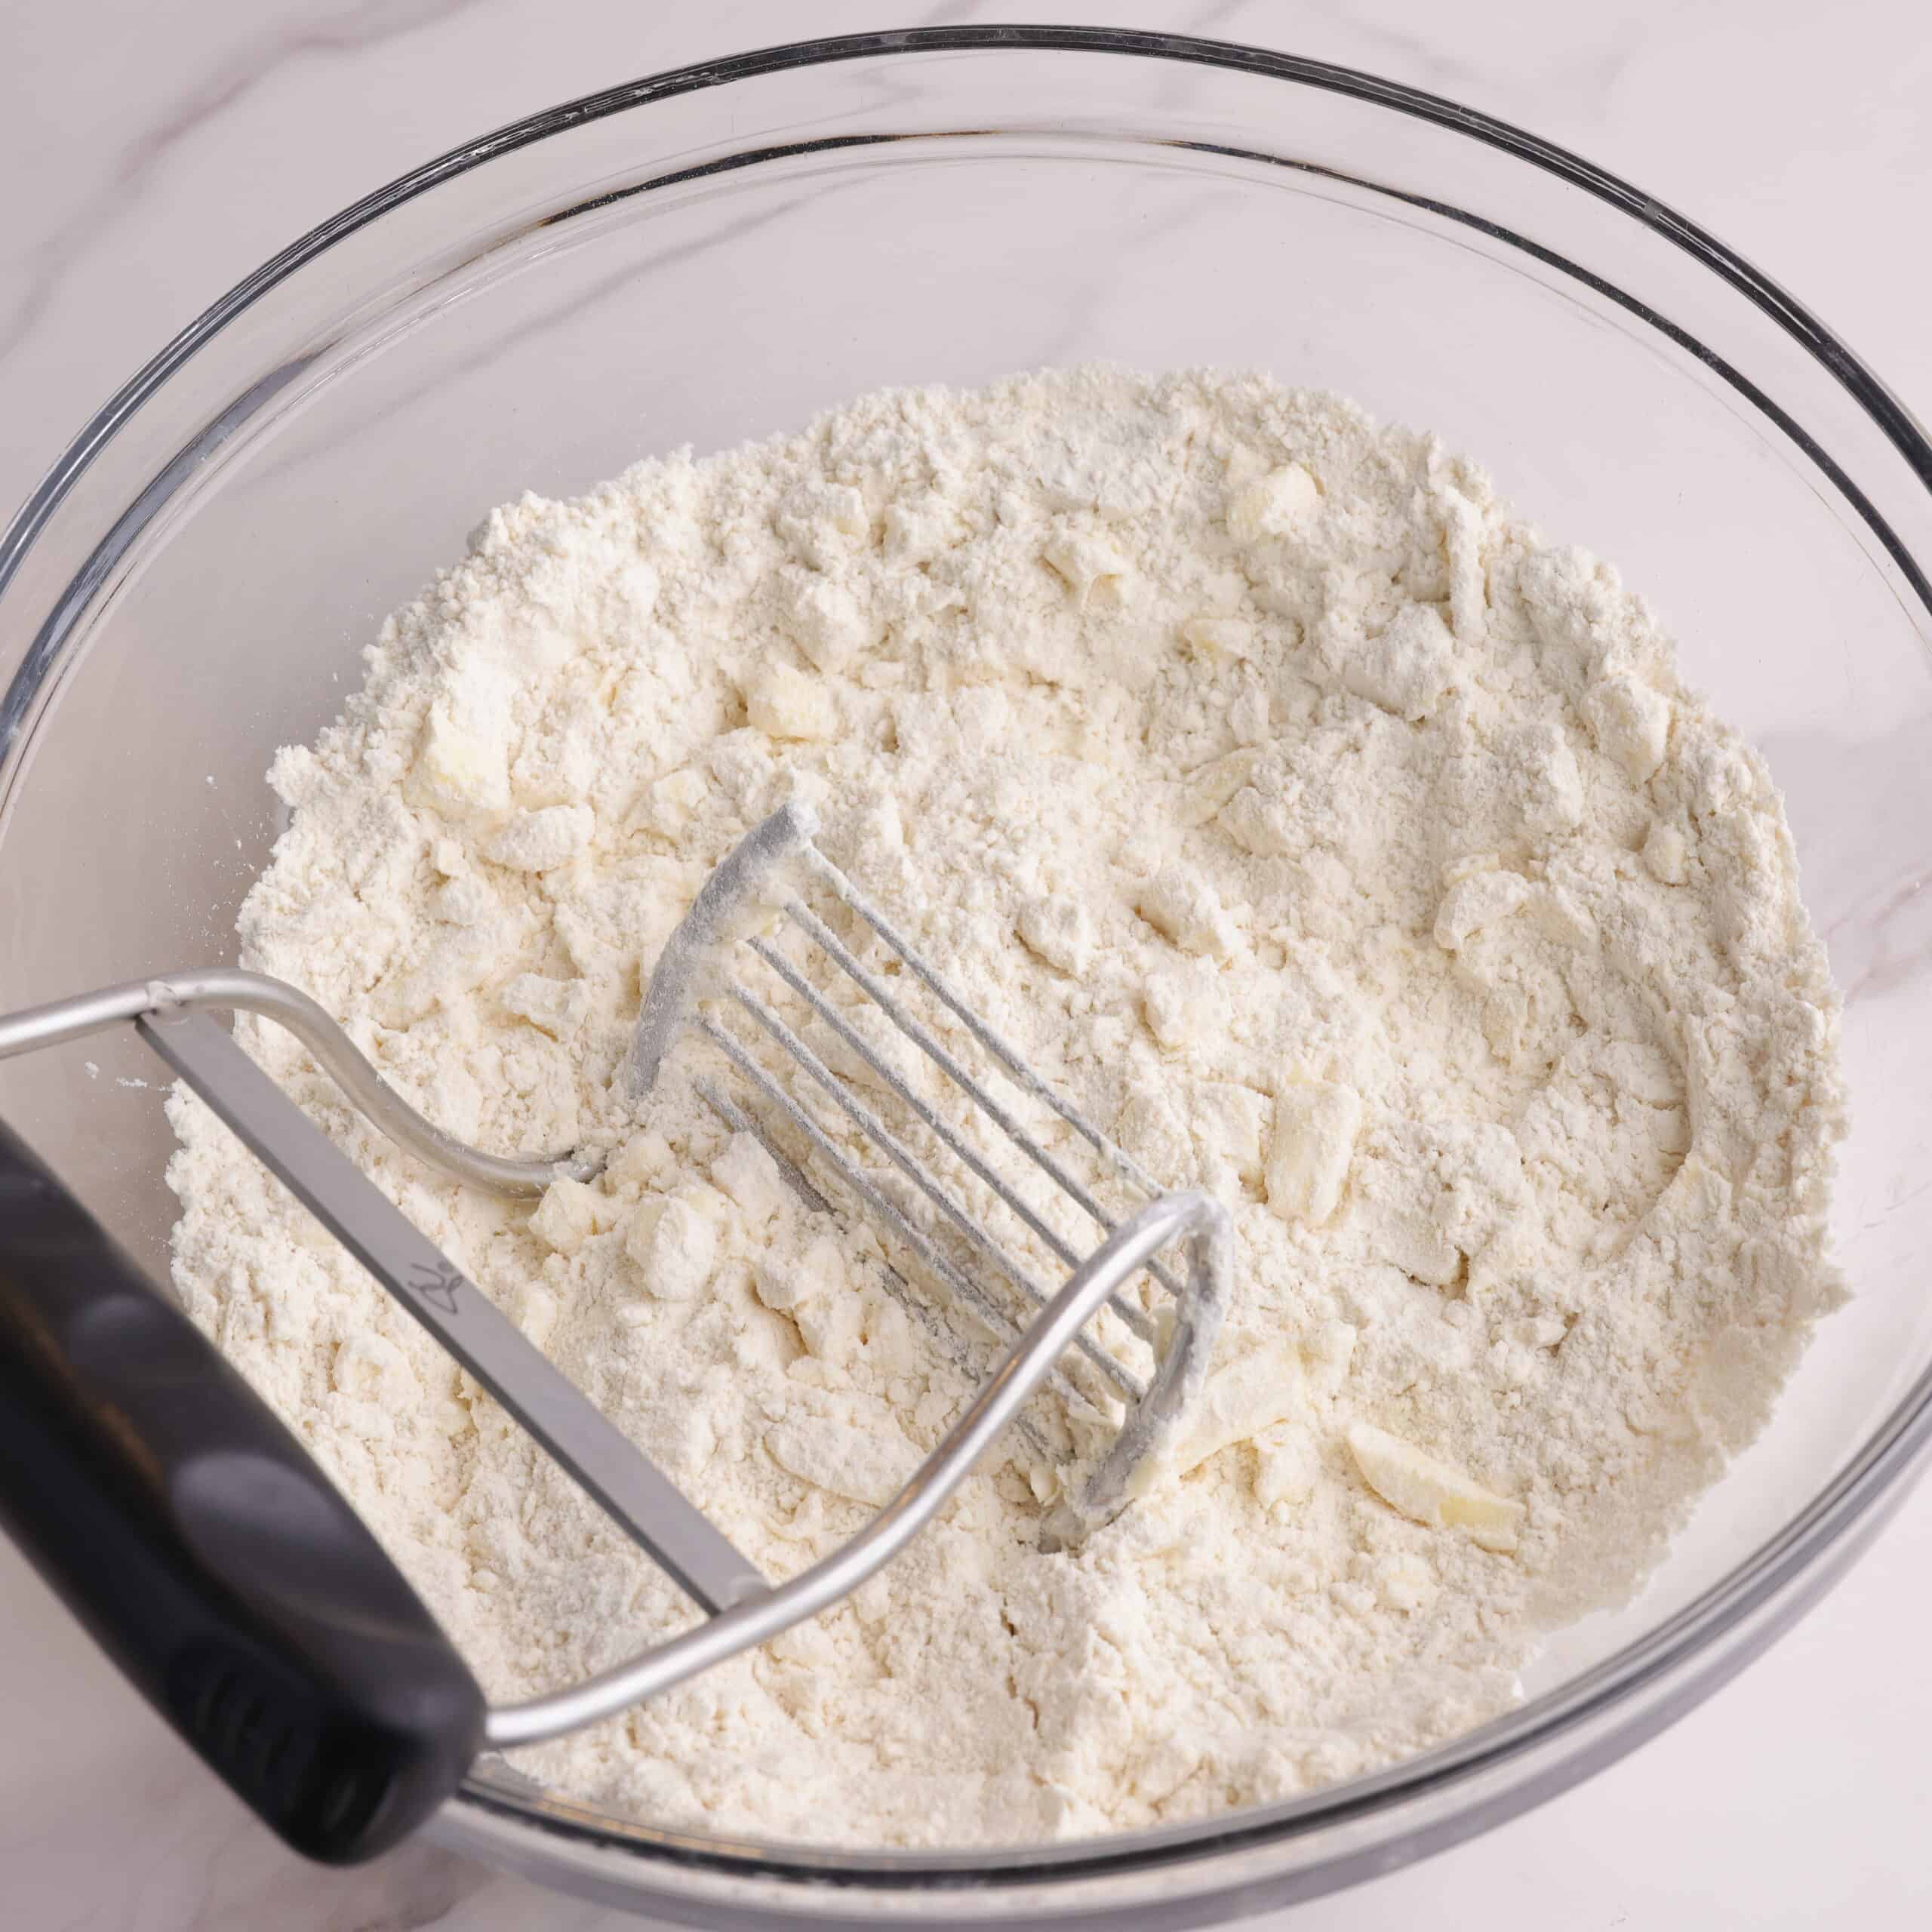
Step 1: In a mixing bowl cut the cold butter into the flour using either a pastry cutter or your hands. Continue to cut it in until small chunks of butter remain in the flour. Don't mix it in completely, you want to be able to still see the butter clumps.
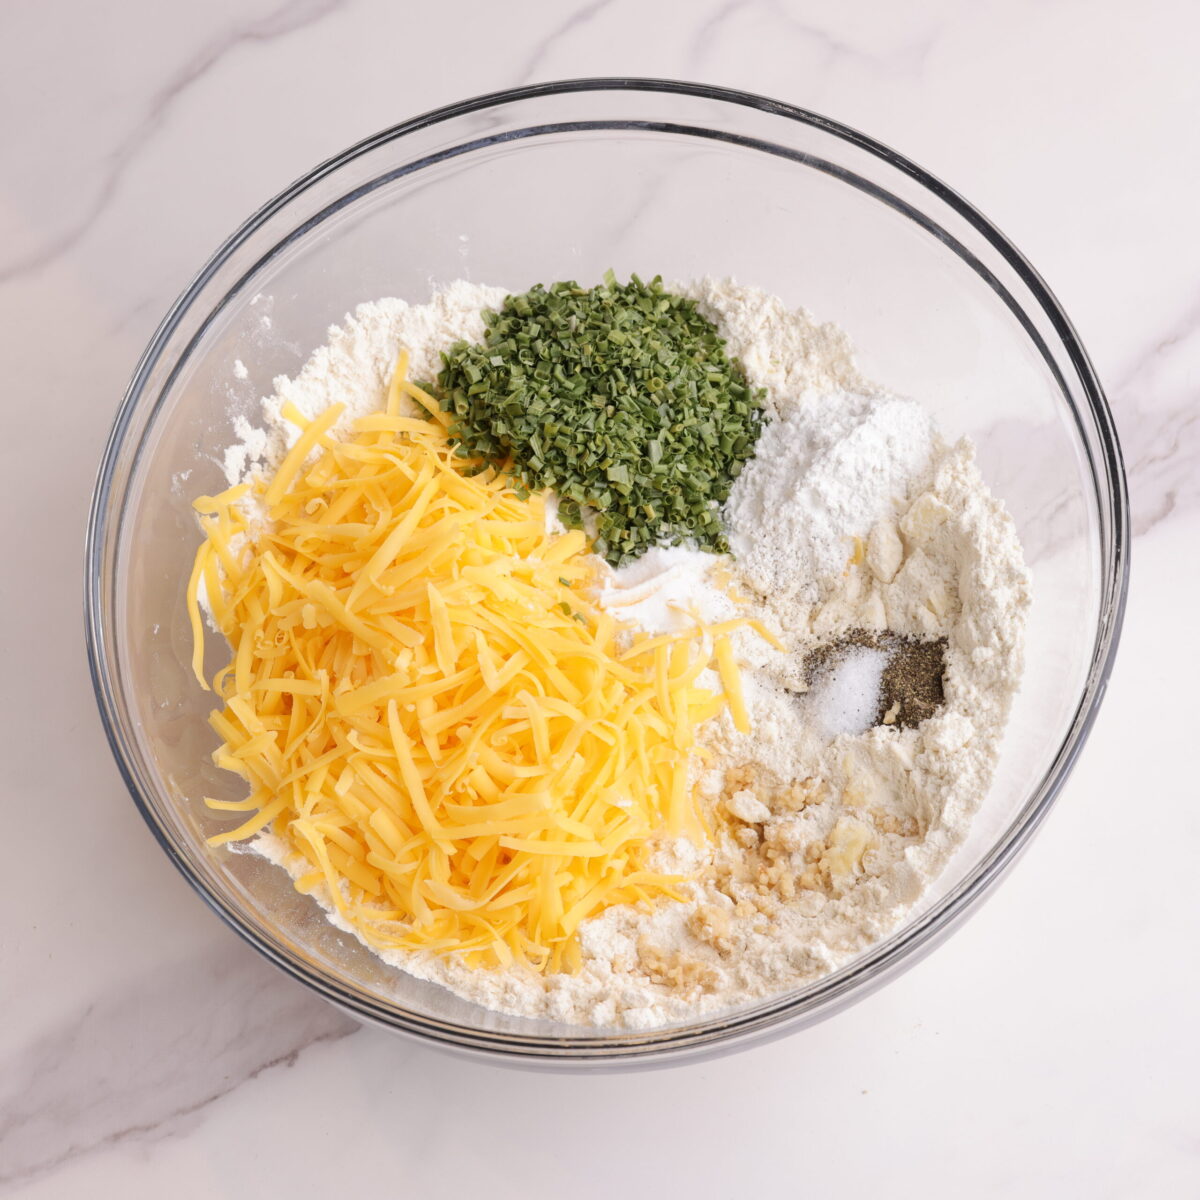
Step 2: Add in the remaining dry ingredients: baking powder, baking soda, salt, pepper, cheese, chives and the minced garlic. Lightly mix together. As you mix it try to ensure the minced garlic gets spread out and doesn't stay in one clump.
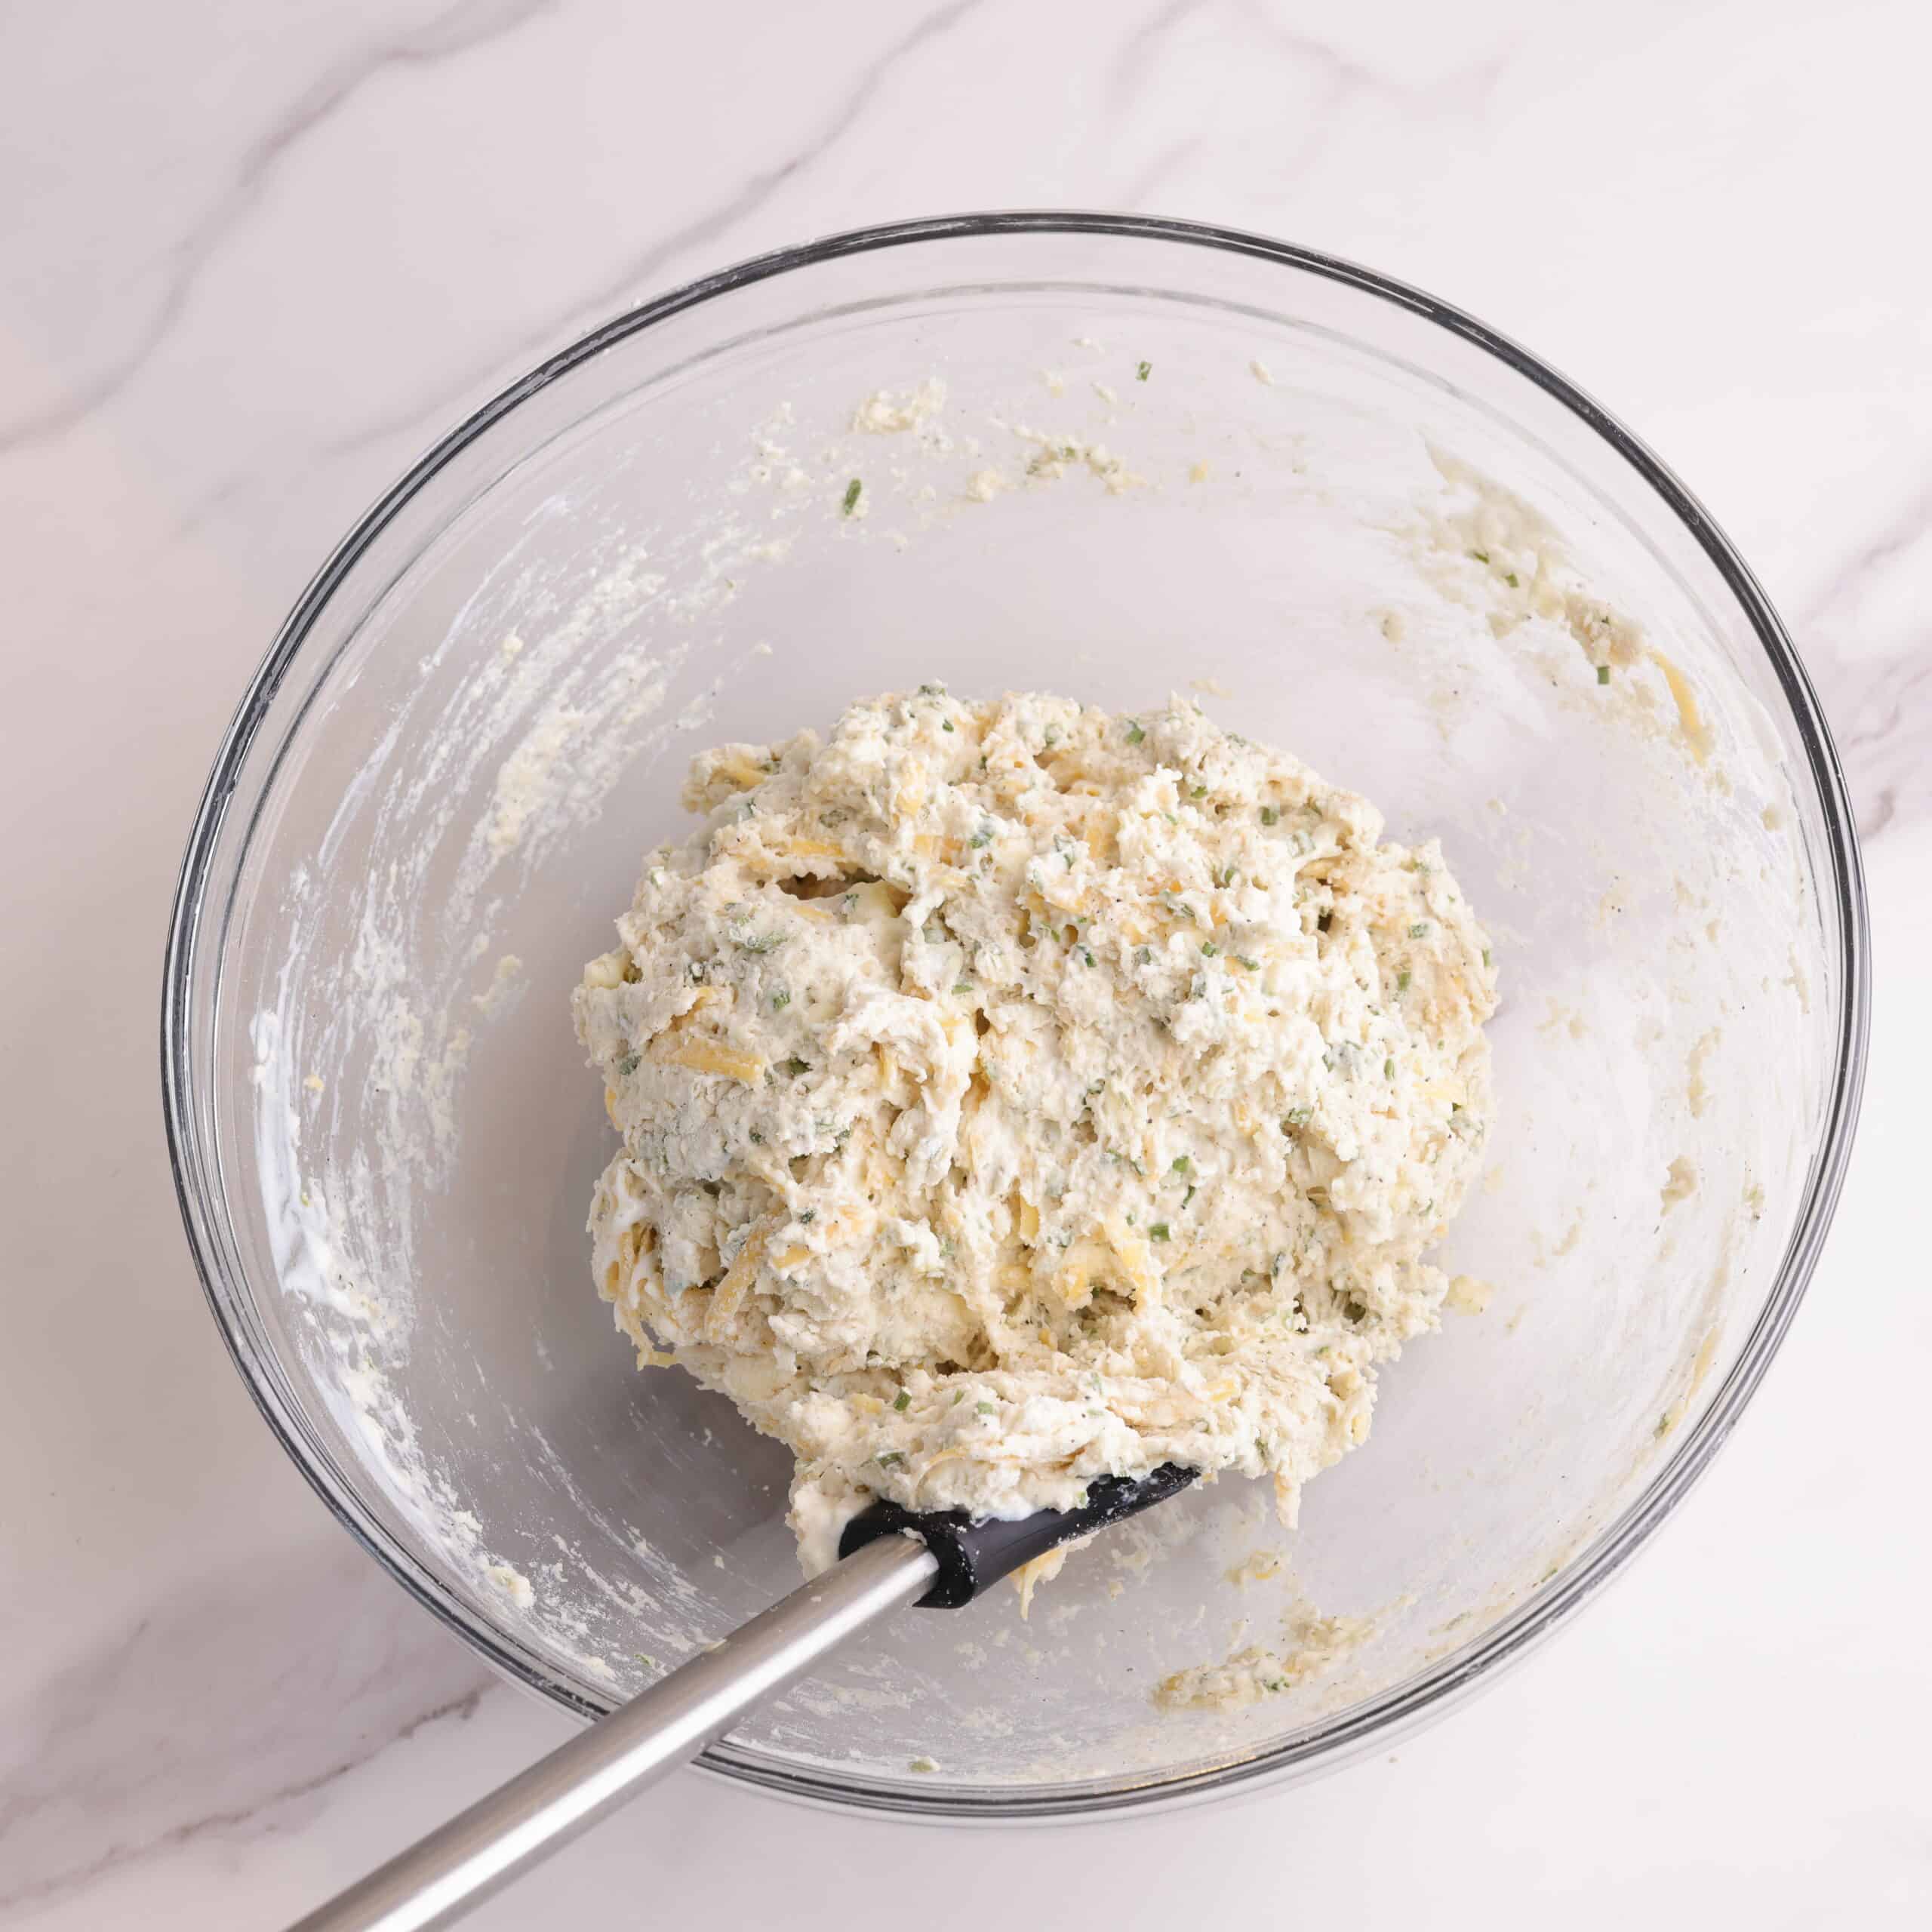
Step 3: Pour in the buttermilk and mix together until it is just combined. Avoid over mixing. As you mix the buttermilk in, watch as the flour gets wet. Once all the flour is wet and you no longer see dry spots, your batter is combined enough. This will help you avoid over mixing.
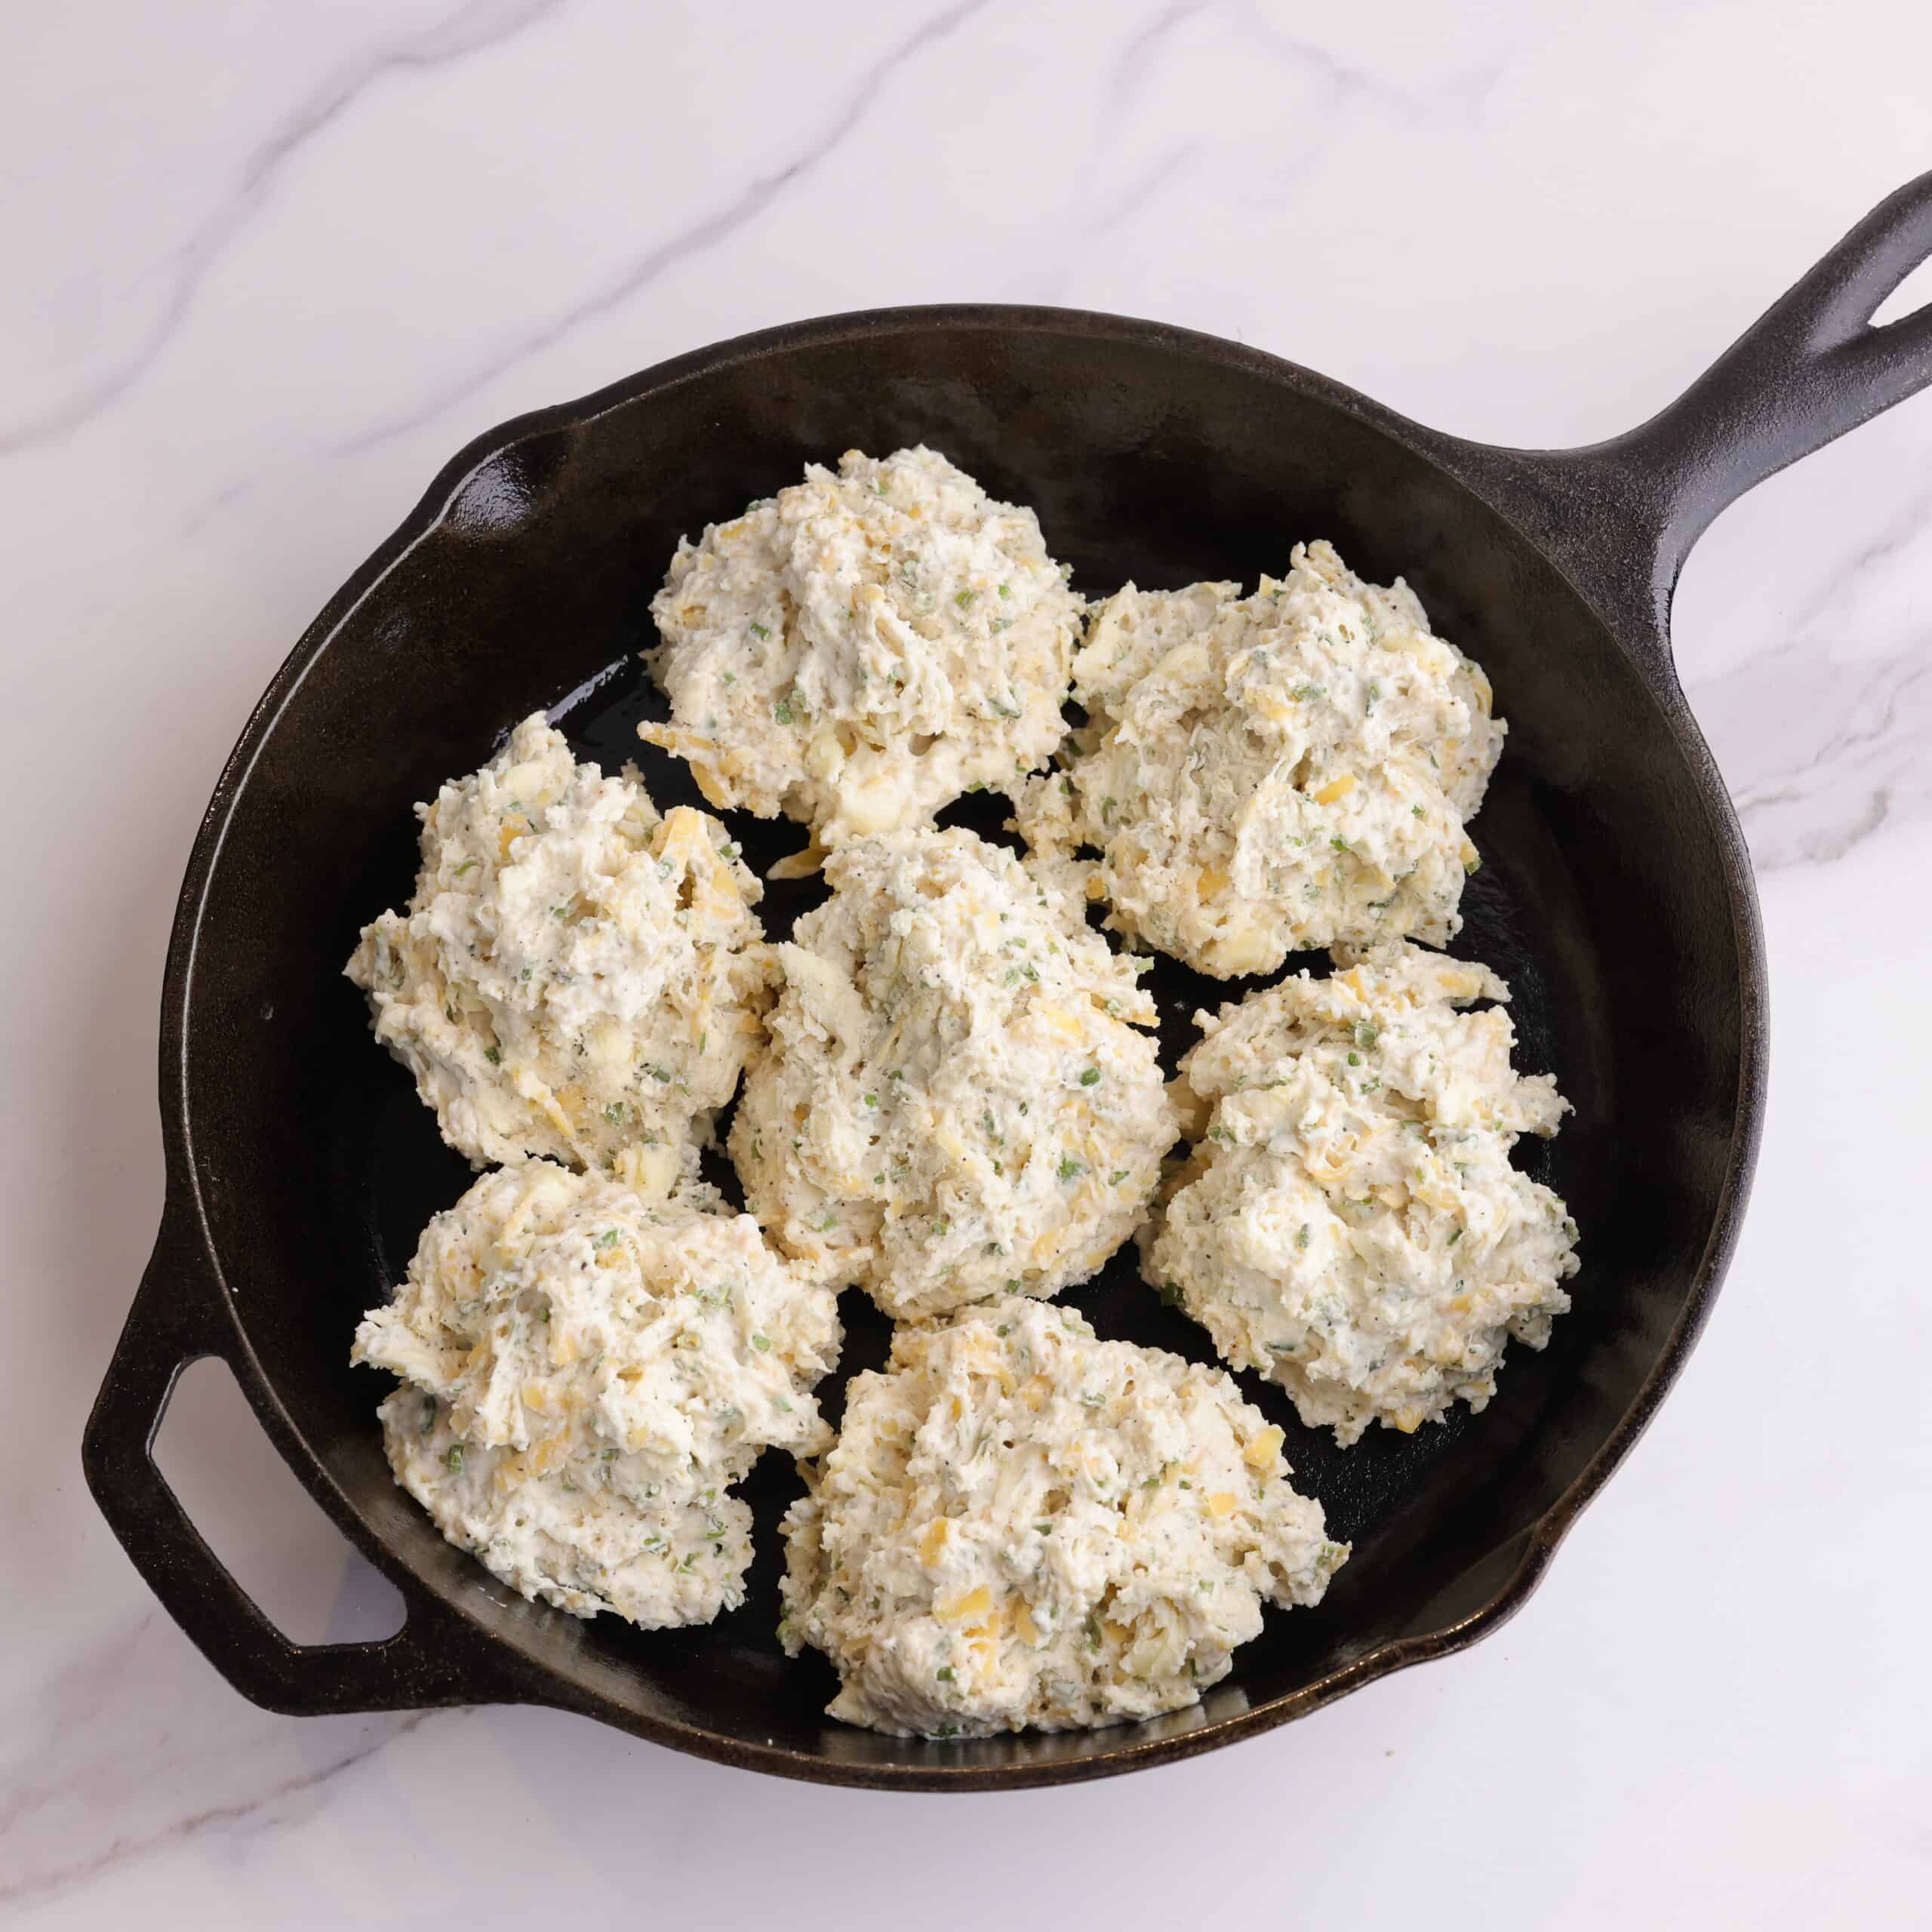
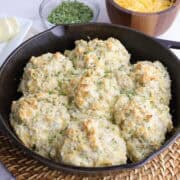
Step 4: Using a spoon, drop batter into an un-greased 10 inch, oven safe, skillet forming 6 large or 7 small biscuits around the exterior and 1 biscuit in the center. Try to keep the biscuits similar in size to ensure even baking. It's okay if your drops touch a little bit. They will bake together in the oven and then be similar to pull-aparts.
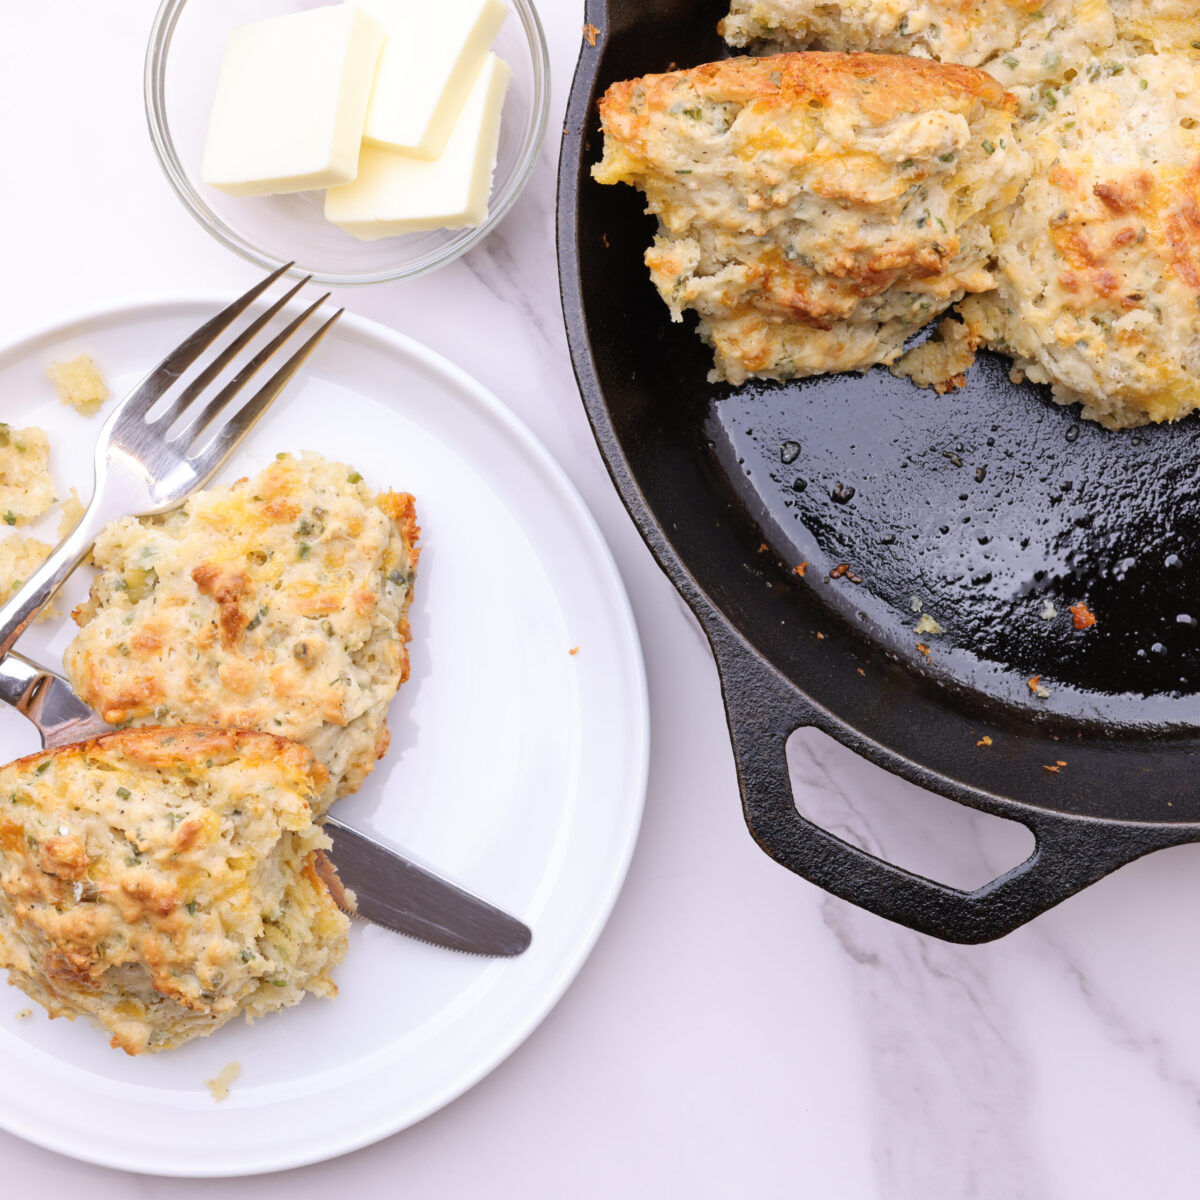
Step 5: Bake for 16-18 minutes or until golden brown and a toothpick comes out clean.
Allow to cool for 5-10 minutes before serving your delicious cheddar chive drop biscuits.
Hint: Do not over mix the batter! You really want it JUST combined. See the description to know how this is achieved in the directions above.
Substitutions
- Flour - use a 1 to 1 gluten free flour alternative for gluten free biscuits.
- Dairy-free - use soured oat or almond milk (add a little vinegar to sour) and use margarine instead of butter (still ensure it is as cold as possible).
Variations
- Bolder Flavors - add a teaspoon of pepper, use fresh chives or use pepper jack cheese for more kick and a stronger flavor in your cheddar chive biscuits.
- Kid friendly - omit the chives and have a delicious cheese biscuit.
See this Pesto Caesar Salad recipe or my Blackened Salmon Caesar Salad recipe on my website for a great pairing to this recipe!
Equipment
As in most recipes, I use a cast iron skillet for this recipe. I love to use raw cast iron here as it adds more flavor and allows the cheese to really crisp around the edges. An enameled skillet would work as well. Whatever skillet you choose ensure it is oven safe, including the handle and do not use a non-stick skillet.
Alternatively, use a 9x9 glass baking dish instead of a skillet, but edges won't be as crisp and baking time may vary.
Storage
The first few days: Store any leftover cheddar chive biscuits in an airtight container at room temperature or in the fridge for up to 3 days.
Freezing: You can freeze the baked biscuits in an airtight container or bag. When you are ready to eat them, allow them to thaw slowly on the counter. They aren't as light and flaky as the day they were baked but they are still good.
Reheating: My most preferred way to reheat a cheddar chive biscuit is to cut it in half and put it in the toaster for a minute or two. This helps to warm it without making it soggy or drying it out and brings a little life back to the exterior.
Top Tip
Keep your butter cold. I mean COLD. Don't pull it out of the fridge until you are ready to use it. Then, ensure you have enough time to finish mixing up your batter and get it in the oven so that it doesn't sit on the counter and warm up. Cold butter provides the flaky interior of the biscuits that we love and provides a better rise, adding to the lightness of the biscuit.
FAQ
Ideally these would be prepped and baked right away but you can mix the batter ahead of time and keep it in the fridge for up to 6 hours before baking. This may slightly affect the rise of the biscuits but not to the point of unacceptable.
Related
Looking for other recipes like this? Try these:
Most Recent
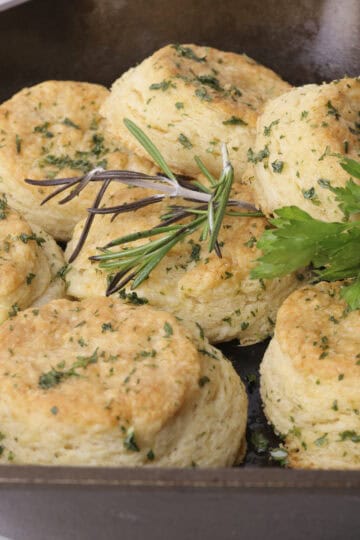
Try these new Alaskan Skillet favorites!
Print


Cheddar Cheese Chive Biscuits
- Total Time: 26-28 minutes
- Yield: 7 biscuits 1x
Description
The light taste of garlic with the subtly of the chives and sharpness of the cheddar ring out the chorus of a perfected trio. These Cheddar Chive Drop Biscuits are quick, no mess and flavored for fullness but not to overpower, making them a go-to side dish for pastas, soups, salads and more.
Ingredients
2 cups (290g) all purpose flour
½ cup (2oz) unsalted butter cold
1 tablespoon (13g) baking powder
½ teaspoon (2g) baking soda
¼ teaspoon salt
½ teaspoon pepper
1 teaspoon (6g) garlic minced
1 ¼ cups (80g) sharp cheddar cheese shredded
¼ cup dried chives
1 ⅓ cups (315ml) buttermilk
Instructions
- Preheat oven to 425 degrees Fahrenheit.
- In a mixing bowl cut cold butter into the flour using either a pastry cutter or your hands. Continue to cut it in until small chunks of butter remain in the flour.*
- Add in the remaining dry ingredients: baking powder, baking soda, salt, pepper, cheese, chives and the minced garlic. Lightly mix together and try to ensure the minced garlic gets spread out and doesn't stay in one clump.
- Pour in the buttermilk and mix together until just combined. Avoid over mixing (see description instructions for how to avoid over mixing).*
- Using a spoon, drop the batter into an un-greased 10 inch, oven safe, skillet* forming 6 large or 7 small biscuits around the exterior and 1 biscuit in the center. Try to keep the biscuits similar in size to ensure even baking.
- Bake for 16-18 minutes or until golden brown and a toothpick comes out clean.
- Allow to cool for 5-10 minutes before serving.
*All nutritional information is an estimation only. Exact nutritional value depends on exact amounts and ingredients used.
Notes
1. Make sure you butter is cold. Very very cold. I recommend leaving it in the fridge right up until you are ready to cut it into the flour. From there, work at finishing the biscuits in one sitting. Leaving the dough on the counter allows the butter to soften and while your biscuits will still turn out, they won't be as flaky or well shaped.
2. Do not over mix your dough. To avoid this watch as you're mixing the buttermilk in to see your flour getting wet. Once all the flour is wet and you no longer see dry spots, your batter is combined enough.
3. Alternatively you can use a 9x9 glass baking dish instead of a skillet. Do not use a non-stick skillet in the oven.
- Prep Time: 10 minutes
- Cook Time: 16-18 minutes
- Category: Side Dishes
- Method: Bake
- Cuisine: American
Manga says
I made these tonight and they were delicious and went well with turkey vegtable soup! Thank you for the recipe!
Jenice says
Thank you Manga! I'm glad they were the perfect side for you!
Jenice Wallace says
These biscuits are so quick to whip up and taste delicious! Perfect for the evenings when you want fresh bread but don't have time for a true loaf. They are versatile and not overpowering in flavor making them the perfect side dish to nearly every meal.